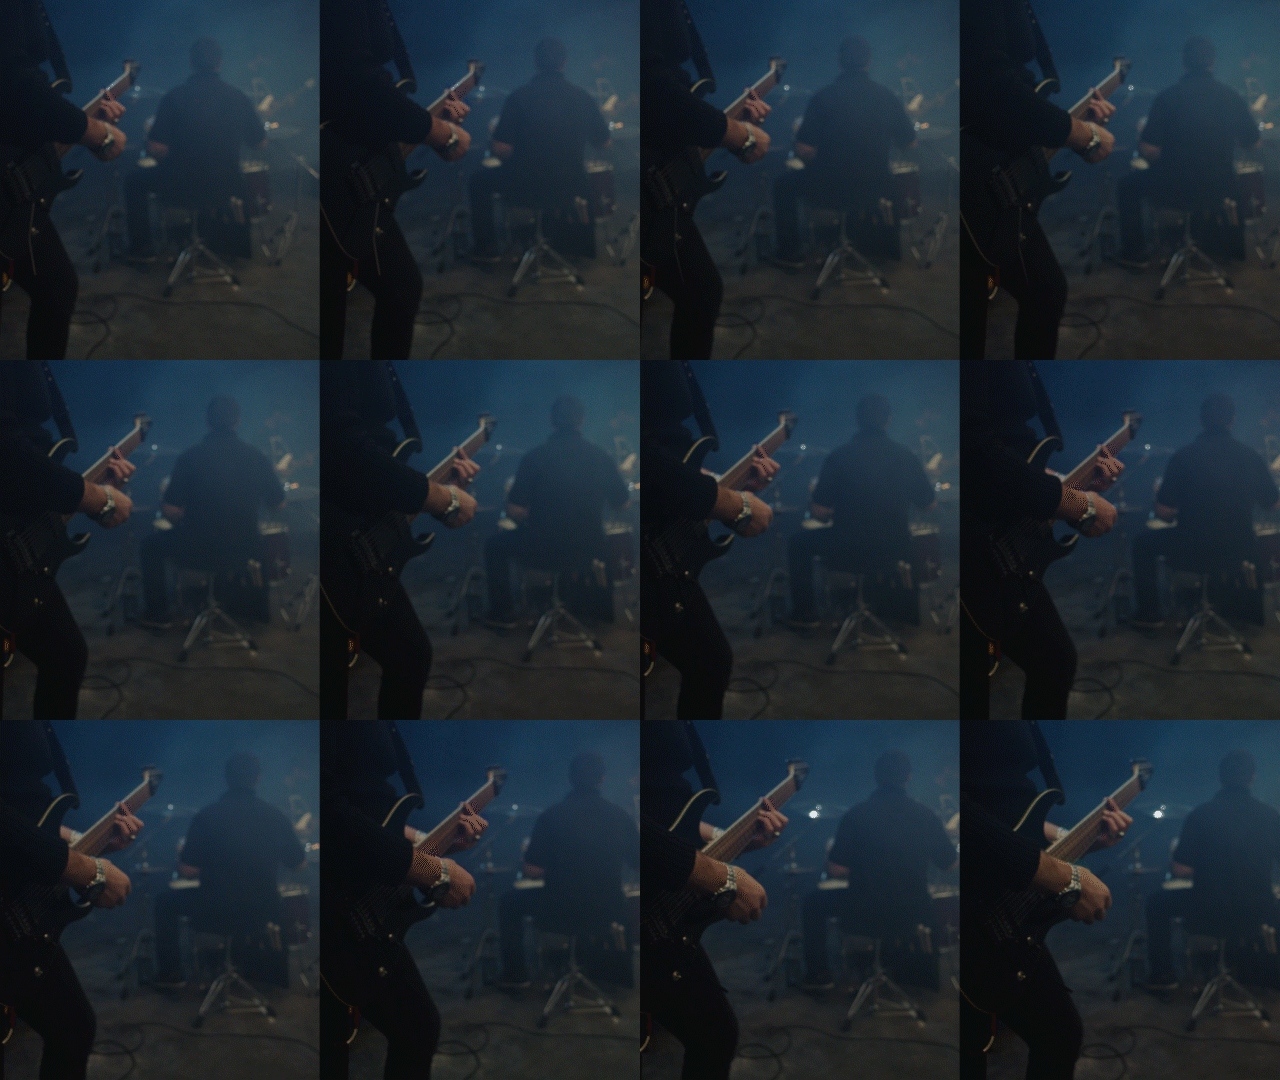
One of the most irritating things that can happen to any content creator and filmmaker is when they have shot an amazing scene and then when they import it to their system for editing, they realize there exist some DEFECTs in the video. The defect can be many things like noise, overexposure, and in the case of today’s subject, Light Flickering. In this article, you will learn how to remove flicker with Adobe Premiere Pro.
If you are a careful videographer who always remembers to do that sort of stuff then great! I really envy you. But if you are like me and always forget stuff left and right, then this blog post is going to help you save some amazing video footage that you might have thought is ruined and has no use.
What Is Light Flicker?
Light flicker happens when the shutter speed of your camera is not in sync with the light frequency or brightness of the light source. Lamps, Neons, or any other light source, pulses based on the standard frequency of the electricity in the region. For example, the frequency for the US is 60hz and the UK is 50. To counter this issue, many videographers try to sync their shutter speed with the light frequency. RED has a tool that will calculate the perfect shutter speed for any Power Frequency based on the frame rate you would like to film in.
So, to find your enemy, double-check these items:
-
Lighting Condition: Uneven or fluctuating lighting or LED lights, especially from certain types of artificial lighting such as fluorescent bulbs or older incandescent lights, can cause flickering in the recorded video.
-
Slow-Mo or Time-Lapse: When shooting slow-motion or time-lapse videos, the camera captures frames at different rates than the standard frame rate used for regular videos. If the lighting conditions or camera settings are inconsistent throughout the recording, flickering can occur.
-
Camera Settings: Incorrect camera settings, such as an inappropriate shutter speed or exposure settings, can lead to flickering in the recorded video.
-
Corrupted Video Source: A video file can get corrupted or damaged during file transfer or compression, leading to flickering during playback.
Read more in our Blog: What are Export Settings in Premiere Pro?
Remove Flicker Premiere Pro
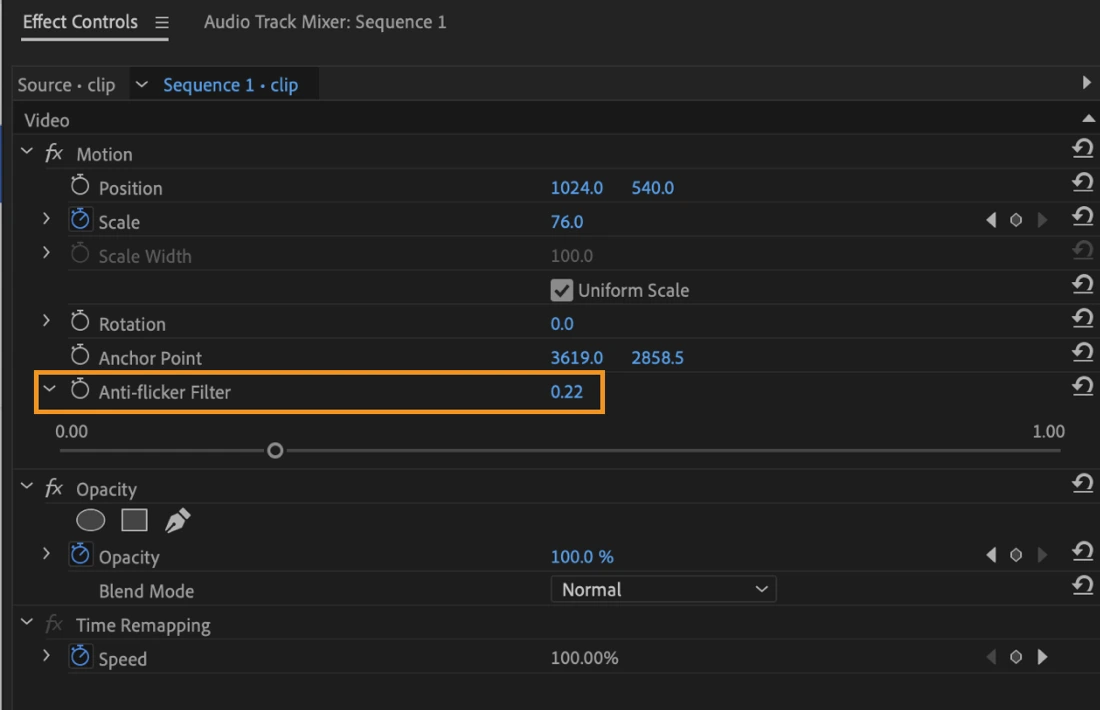
Premiere Pro offers an Anti-flicker Filter effect that can help with flicker removal. The strength of the filter needs to be adjusted based on the amount of flickering problem and the sharpness of the image. You can also change the filter intensity over time by setting keyframes.
Here are the steps on how to use this effect:
-
Select the clip that you want to apply the filter to.
-
Go to the Effects panel and search for “Anti-flicker.“
-
Drag the Anti-flicker Filter effect onto the clip.
-
In the Effect Controls panel, adjust the filter strength until the flicker is gone.
-
You can also set keyframes to change the filter intensity over time.
Cranking up the Anti-flicker Filter removes more flicker, but it blurs the picture. So, for sharp, contrasty scenes, go aggressive! (source)
No Plugin Method, No Cost
There exists more than one way to salvage a flickering up video clip. The first one is the no plugin method which really blew my mind the first time I learned it! So to do this method:
-
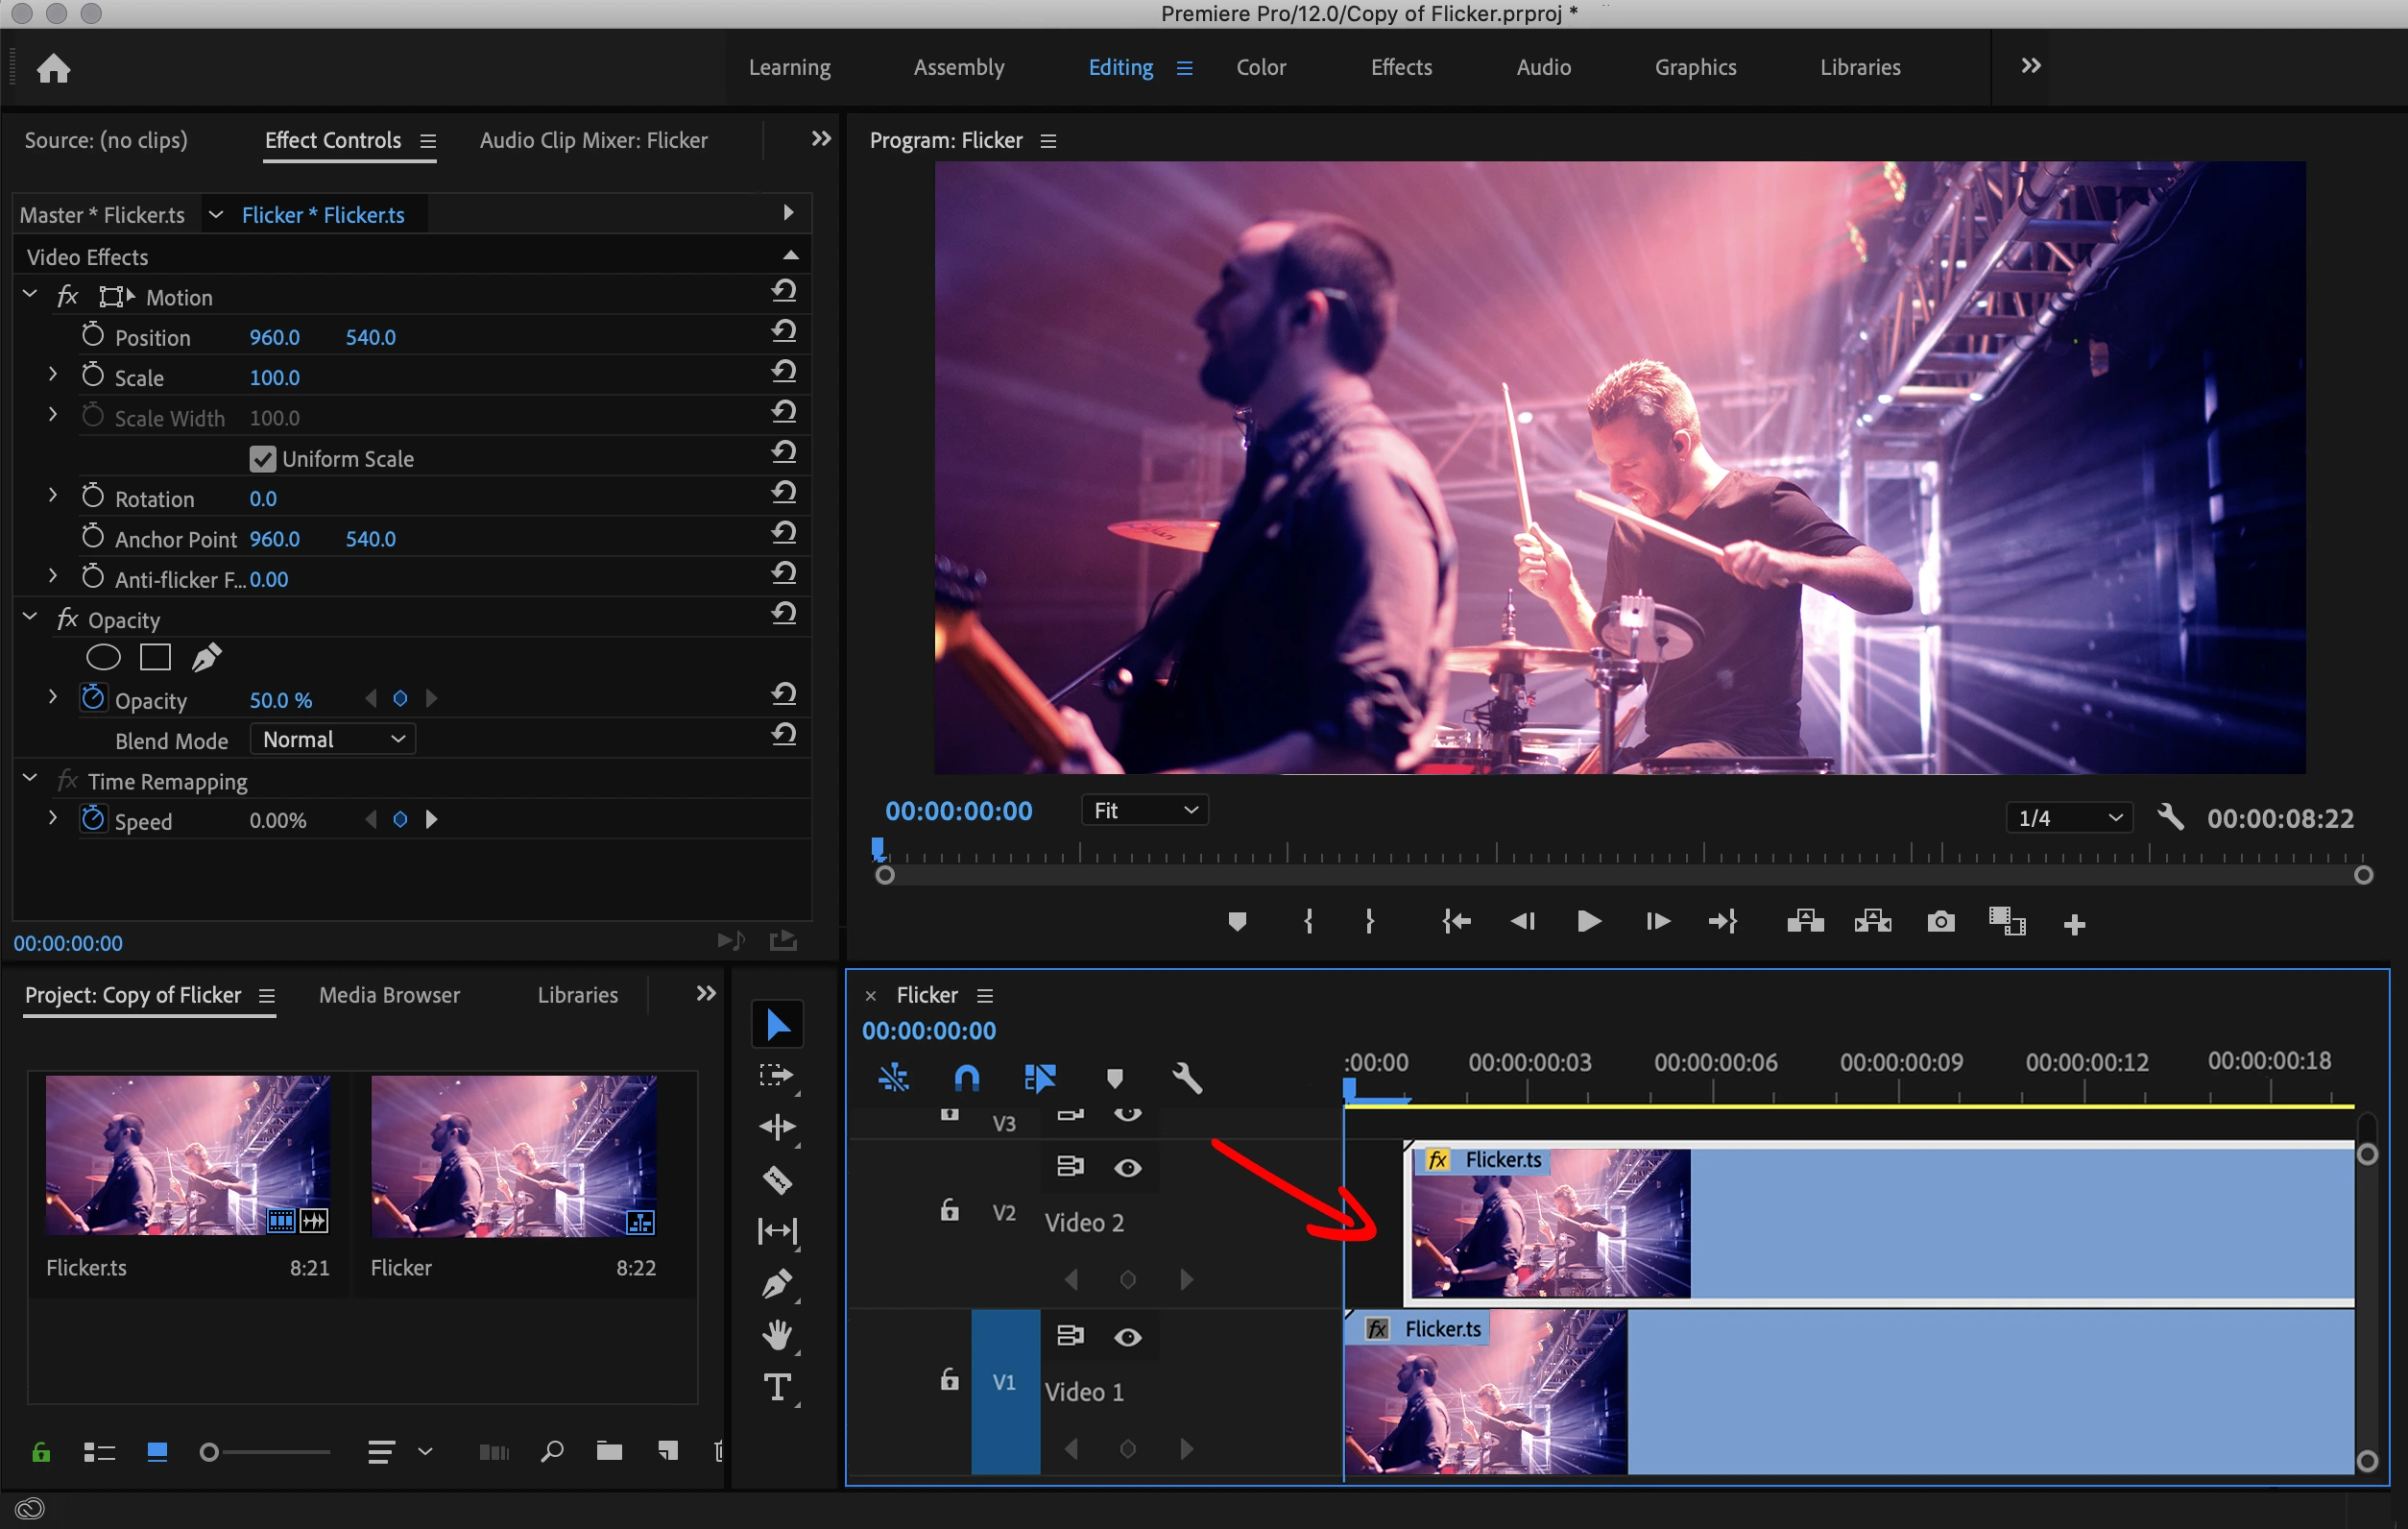
Duplicate your footage and stack them on top of each other.
-
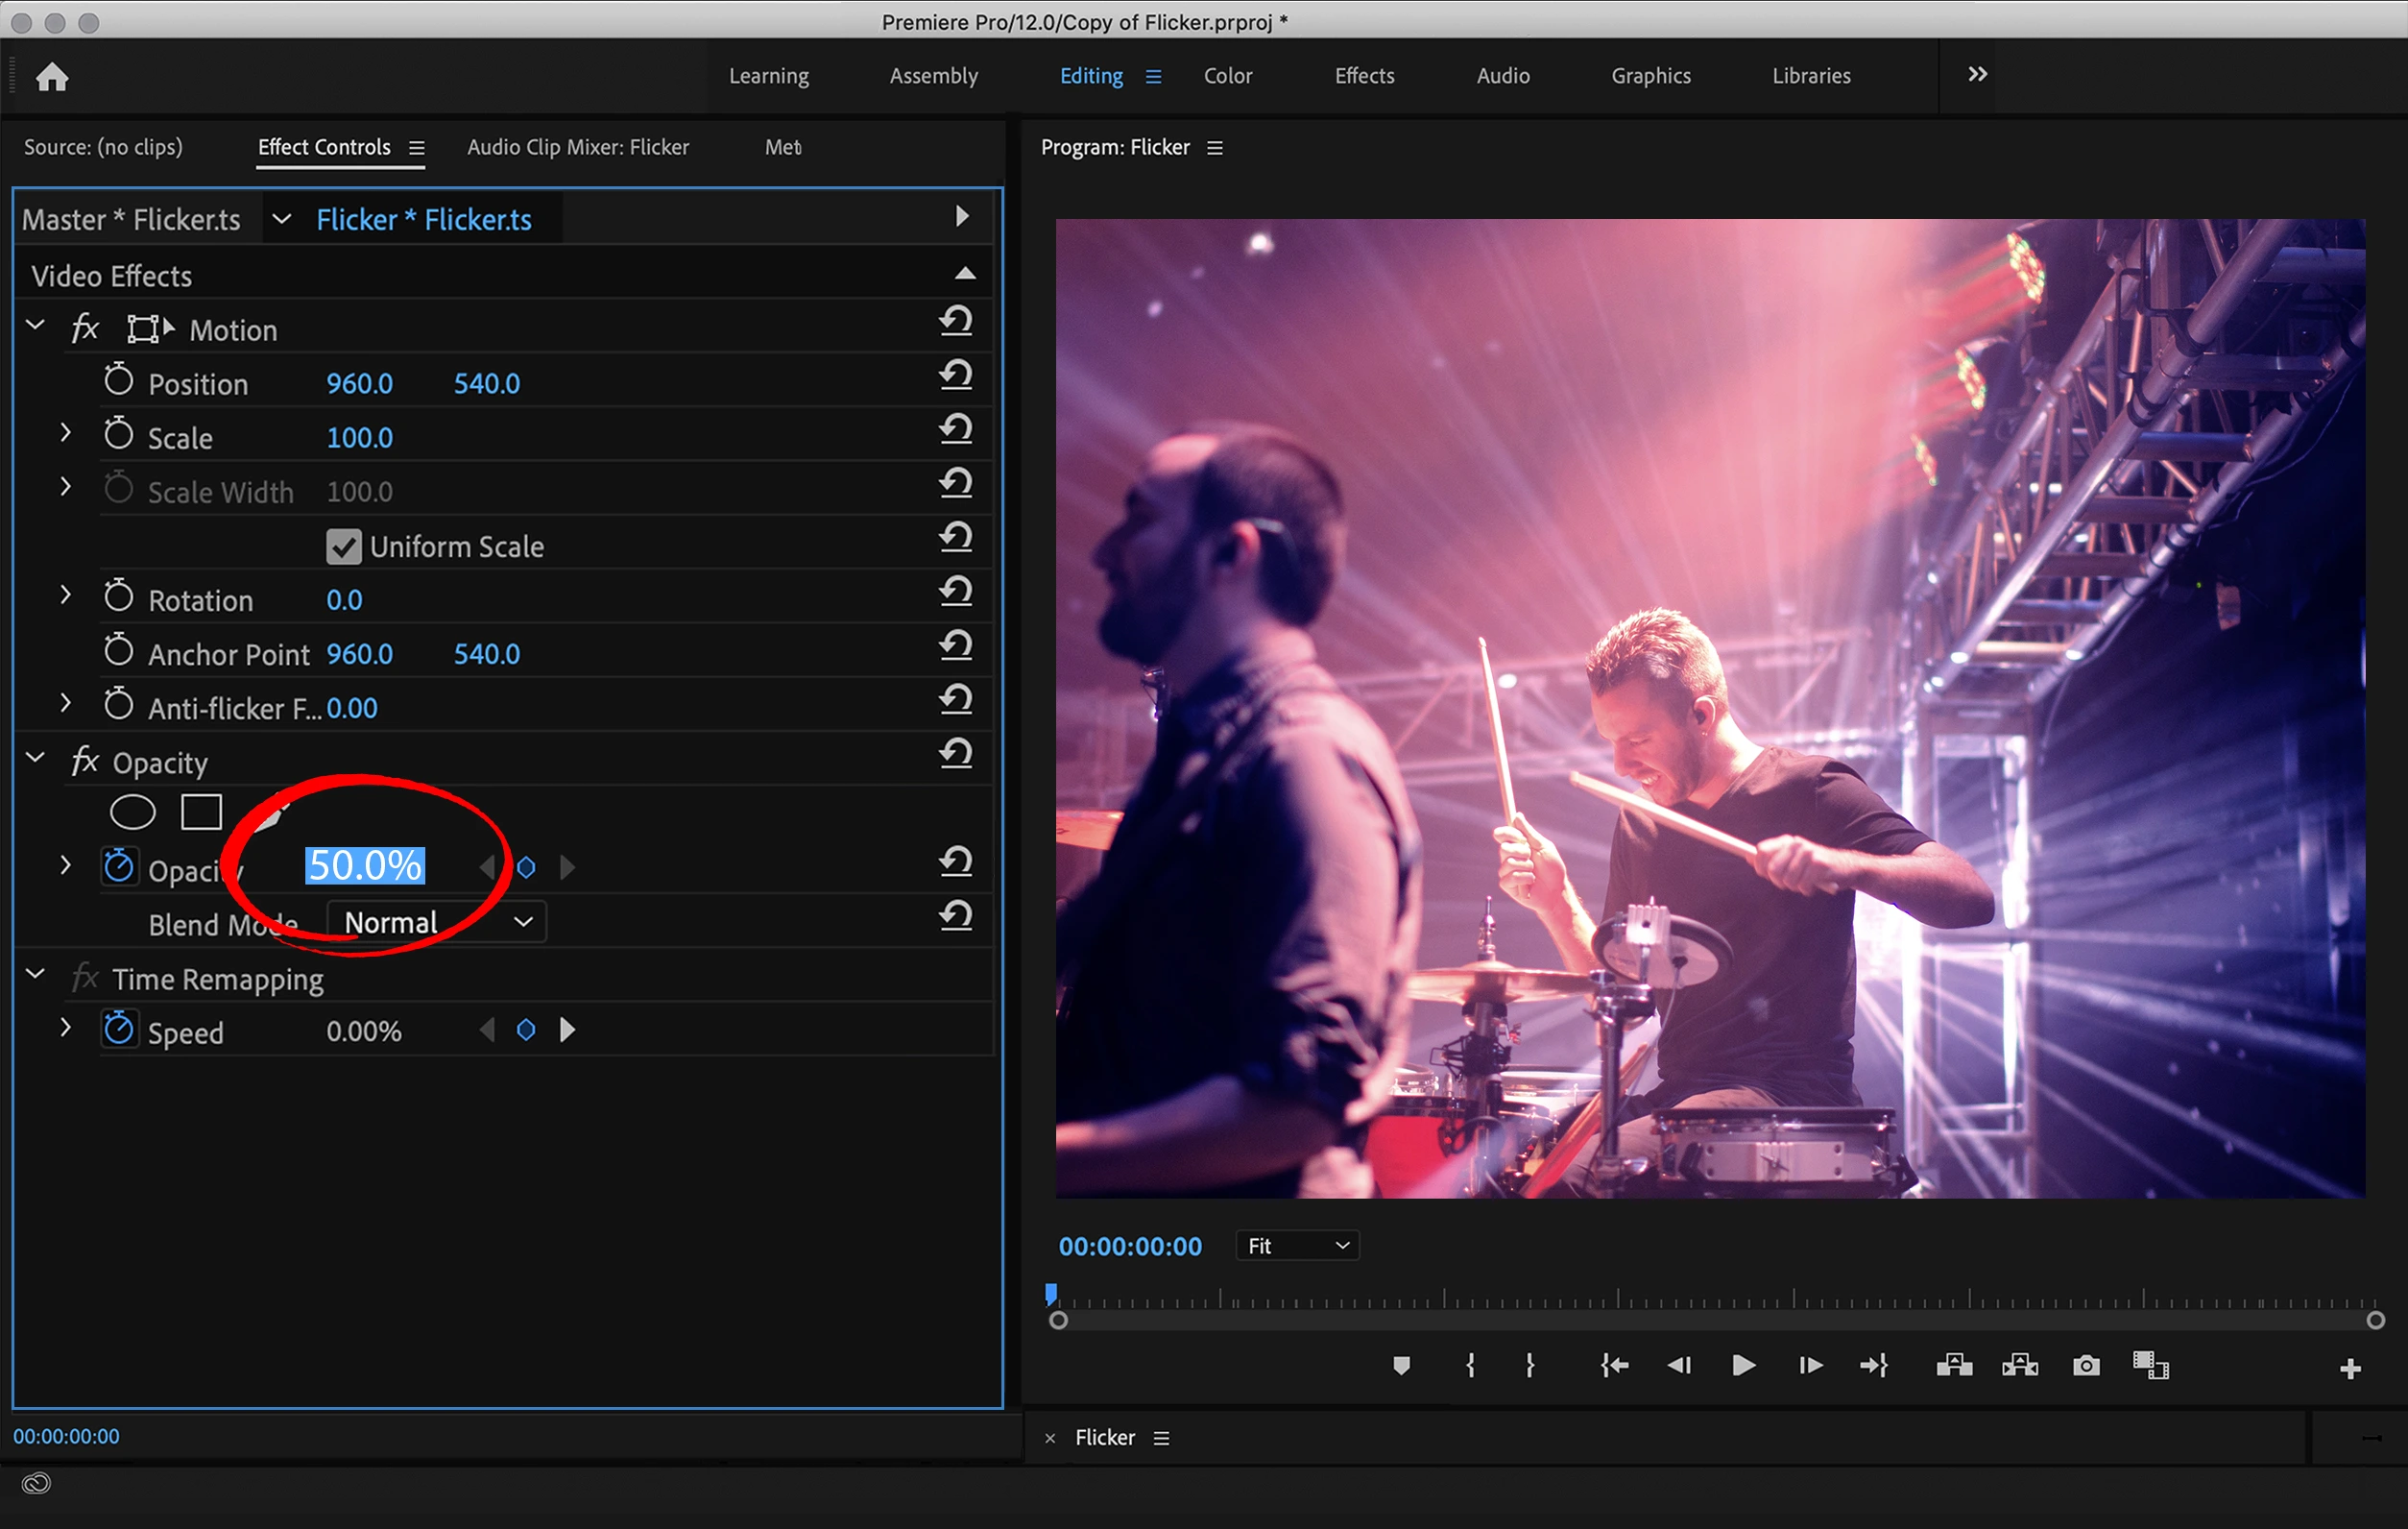
Go to the Effects Control panel.
-
Set the opacity of the top footage to 50
-
Go back to the Timeline, move the top footage one frame forward, and DONE! Goodbye, flicker!
This method works wonders, as long as your footage does not include motion or any fast-moving object. You can also move this method one step further by stacking three lines of footage, just remember to set the opacity to 67 and 33 on the copied footage.
Flicker-Free: Premiere Pro Plugins
If for any reason you can not use the previous method, or if it didn’t work for your footage, do not worry, there is a plugin for that! Among a list of different back flickers plugins, Flicker-Free Plugin is the one I found to be the best and easiest to use! Flicker-Free is a plugin by Digital Anarchy and it is a really good and comprehensive solution when it comes to getting rid of that nasty light flicker. just keep in mind that the plugin is not free but I believe it worth the price if you are trying to work professionally. Also, I have to say that I am not in any way affiliated with this brand, I’m just suggesting it based on my personal experience and preference.
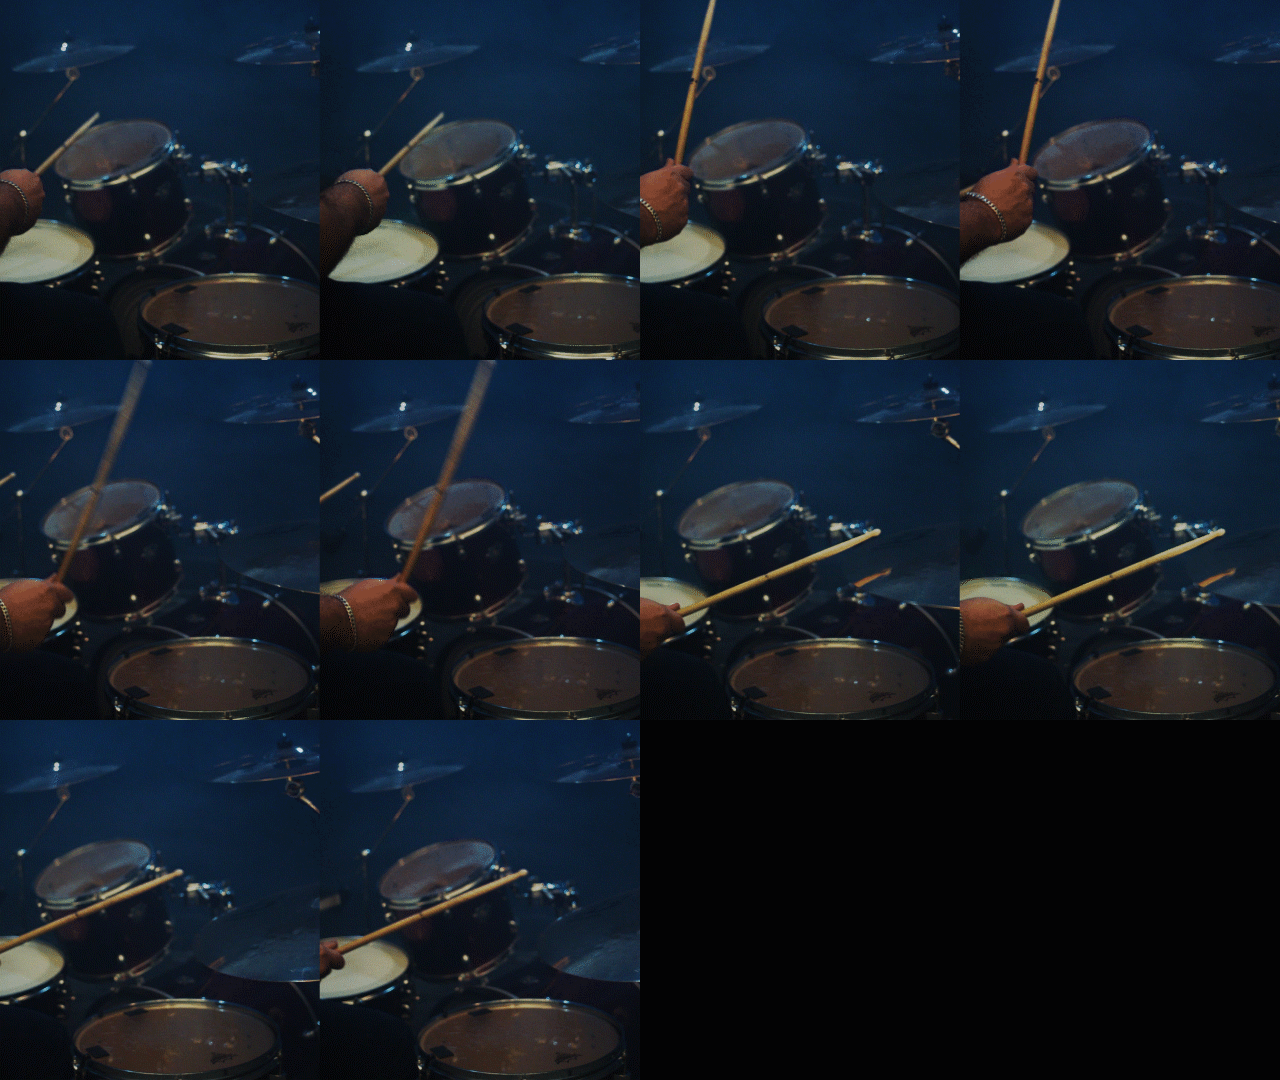
How to eliminate flicker using Flicker-Free
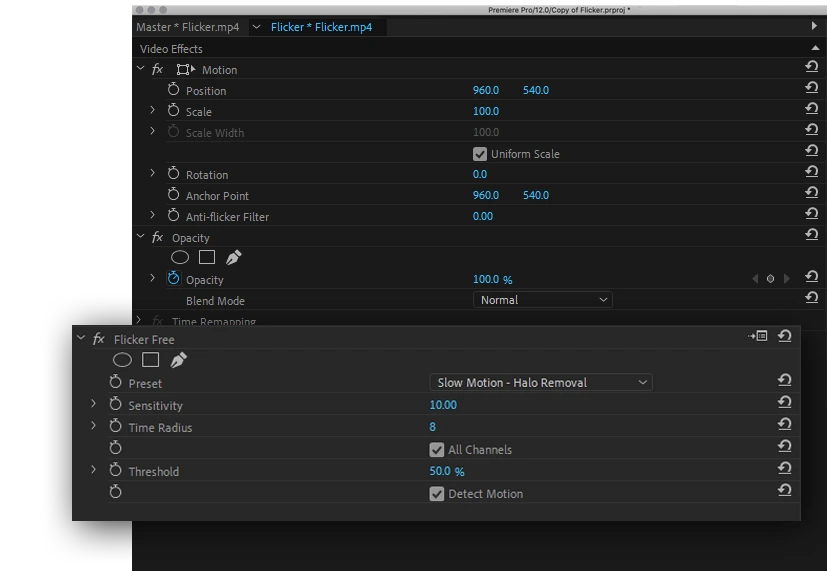
To make Flicker-Free work, all you have to do is go to your Effects panel and search for Flicker-Free. Then you can drag and drop the effect onto your footage. If you go to your Effects Control panel and check under Flicker-Free, you can see that you have some options to play with. You generally do not need to mess with these things because almost always the preset does the job. The only thing you may need to change is the presets. Since flickering can appear in different forms, you may need to change the presets to fit your situation and environment.
Just keep in mind that this plugin, or any other solution, as far as I know, is not a miracle worker. In footage with moving objects, you may see some halos and degrade especially around the moving object. So you have to approach these methods with that in mind. But in most cases, the small loss in quality is a sacrifice worth making.
Conclusion
Flickering problems in videos can be big bummers but fixing them can also be somewhat of an easy job. Of course, it is always better to consider all the things before and while shooting a scene, but these sorts of problems are among those minor inconveniences that are going to happen here and there, so having a Plan B to sort them out is what differentiates a hobbyist from a professional. I hope today’s blog has helped you elevate your video production, content creation, and video editing work!
Best of luck, and bye!
Frequently Asked Questions
Several apps! Our recommendation is using “Adobe Premiere Pro” (Windows/Mac) or “After Effects” (Windows/Mac). Also, free options like “Video DeFlicker” (iOS) and “Flicker Removal” (Android) tackle minor wobbles.
Web warriors like “Kapwing” and “Remove.bg” offer quick online fixes. Upload your shaky video, adjust settings, and voila! Remember, online tools have limitations compared to dedicated apps.
Play with exposure settings, match camera frame rate to flicker frequency (60Hz for most fluorescents), and if all else fails, use video editing software with anti-flicker filters.
Anti-flicker is your video editing superhero! It analyzes footage, identifies brightness fluctuations causing flicker, and smooths them out for a stable, watchable video. It’s a very beneficial part of Premiere Pro Effects Control panel.
Most household lights do (60 times per second), but our eyes don’t catch it. Cameras can, though, causing unwanted wobbles. Understanding camera sensitivity and frame rate helps minimize the impact.
Cheap or poorly designed LED drivers can cause high-frequency flickering invisible to the naked eye, but your camera might pick it up and create unwanted strobe effects. Opt for high-quality LED lights with reliable drivers for smooth video.
