Creating Handheld Camera Shake | After Effects and Premiere

31 Dec 2020

3 Min Read

Today we are going to see how we can recreate the movements of a handheld shaky camera inside adobe premiere and adobe after effects. Creating a camera shake is possible both using built-in tools inside after effects and also with available plugins which we are going to use the one created by Red Giant.

Fake Handheld Camera Movement in Premiere

Using Wiggle in After Effects

Ok, now let’s see how it is done in after effects. First things first, click inside the project panel to import your footage to after effects. You can also drag and drop your video footage there if you prefer. Then right-click on the footage and choose “new comp from selection” so that you can start working on the footage.

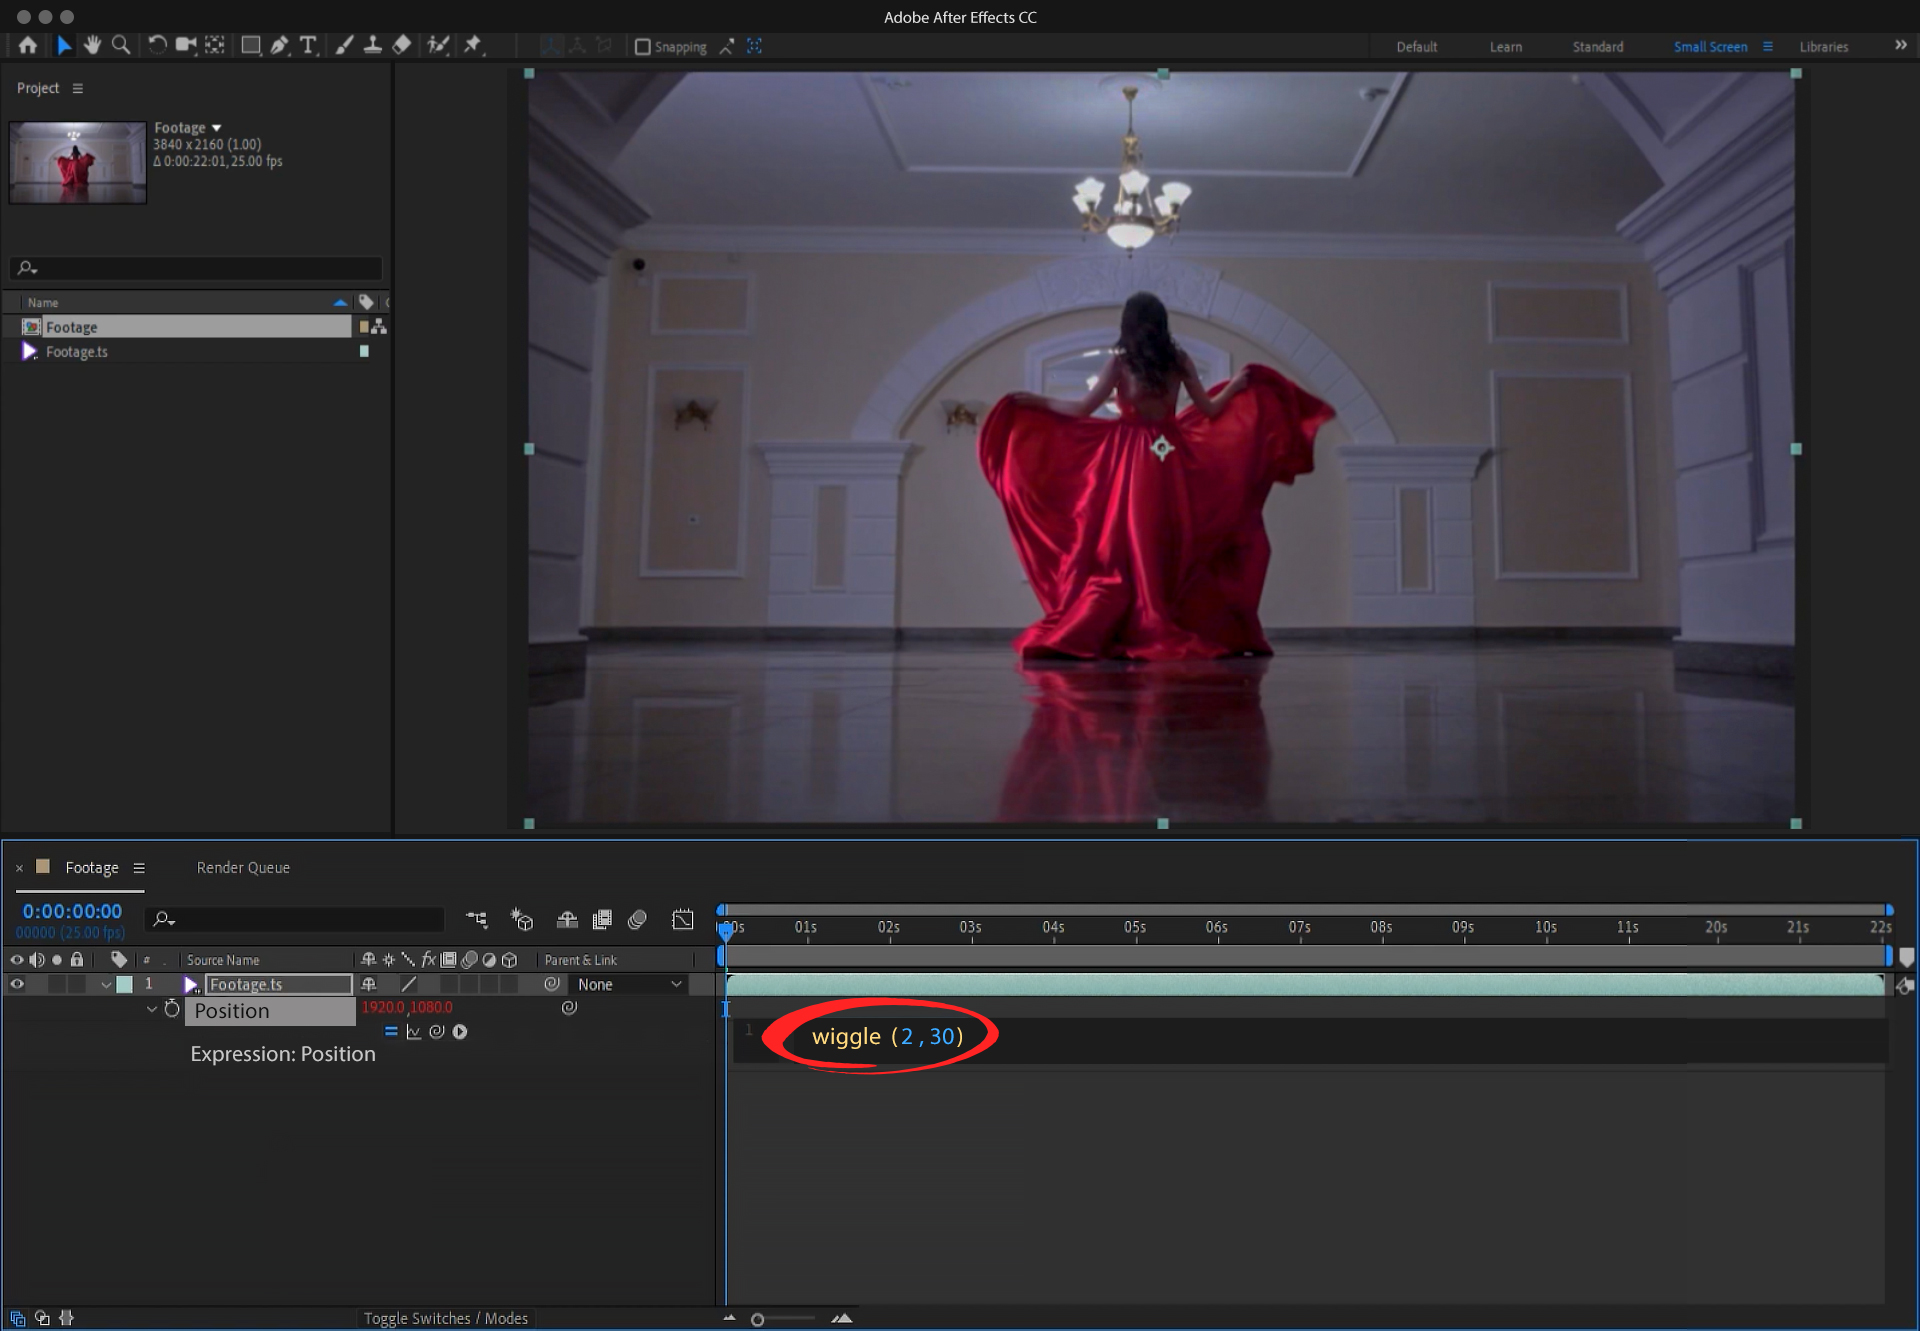
Next, click on the footage to choose it then you are going to hit “P” to bring up the position settings. Then hold down the “Alt” key, which is “Options” on Mac, and click on the stopwatch. What you are about to do is adding some wiggle to the footage and then working with it till it feels right and natural right.

To do that you need to type in on the footage in the timeline “Wiggle”, followed by parentheses and inside the parentheses, you will write 2,30. It will be “wiggle (2,30)”. This code will tell After Effects to wiggle the footage twice per second for thirty pixels. Remember that this number is not a fixed thing and you should try different combinations because every footage is different and in every video you may be looking for a different feel. But in most cases, it seems like 2 wiggles per second and each one for 30 pixels seems to be working just fine.
Position-and-expression
Hit “P” to bring up the position settings
wiggle-setting
On the Footage in Timeline Type “wiggle (2,30)”
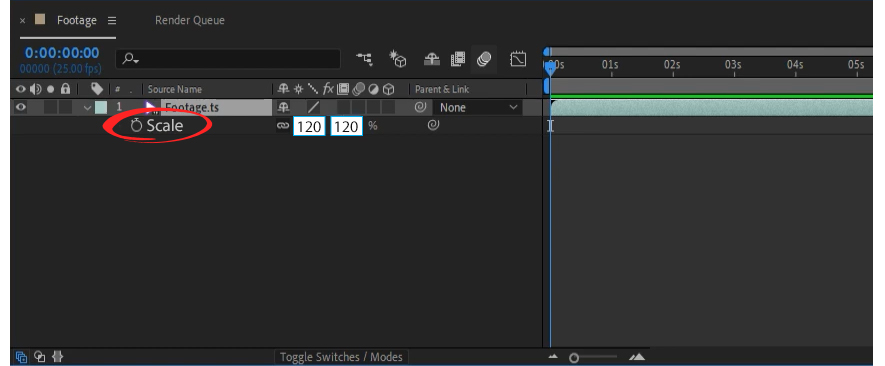
Now what you may probably begin to see in your video is the dark edges that are moving inside and outside the frame. To eliminate that you need to choose the footage again, hit “S” for scale, and then change its value to something like 120%. Depending on the wiggle setting you have chosen, scaling can be done with different numbers.
hit-s-for-scale
Hit “S” for scale, and then change its value to something like 120%.

Red Giant Universe Plugin

For creating the fake camera shake inside premiere pro you need to take a look at Red Giant’s amazing plugin, named Universe.

After installing the plugin, you can access it by going to Window, Extensions, RG Universe Dashboard. You will see that the dashboard is well organized with so many different effects and options ready to be used in your video projects. But the one you are looking for is under “Utilities” and it is named, rather obviously, “Camera Shake”. Opening the category will reveal some great templates useable for different scenarios like Handheld and Shakycam. Either one you decide to use, just make sure your footage is selected in the timeline and then click on apply.
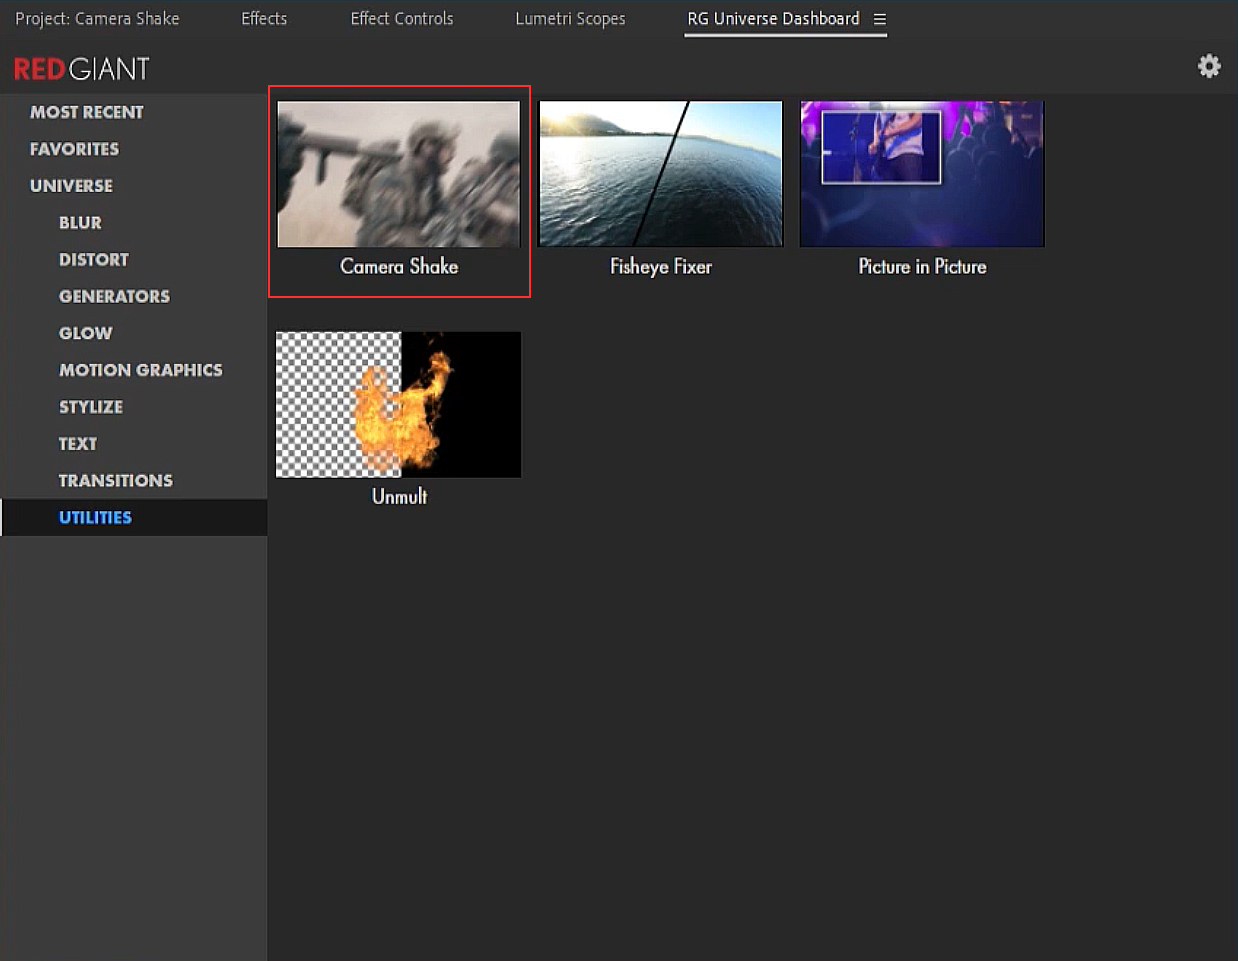
red-giant-camera-shake
In Red Giant Dashboard under “Utilities” find “Camera Shake”
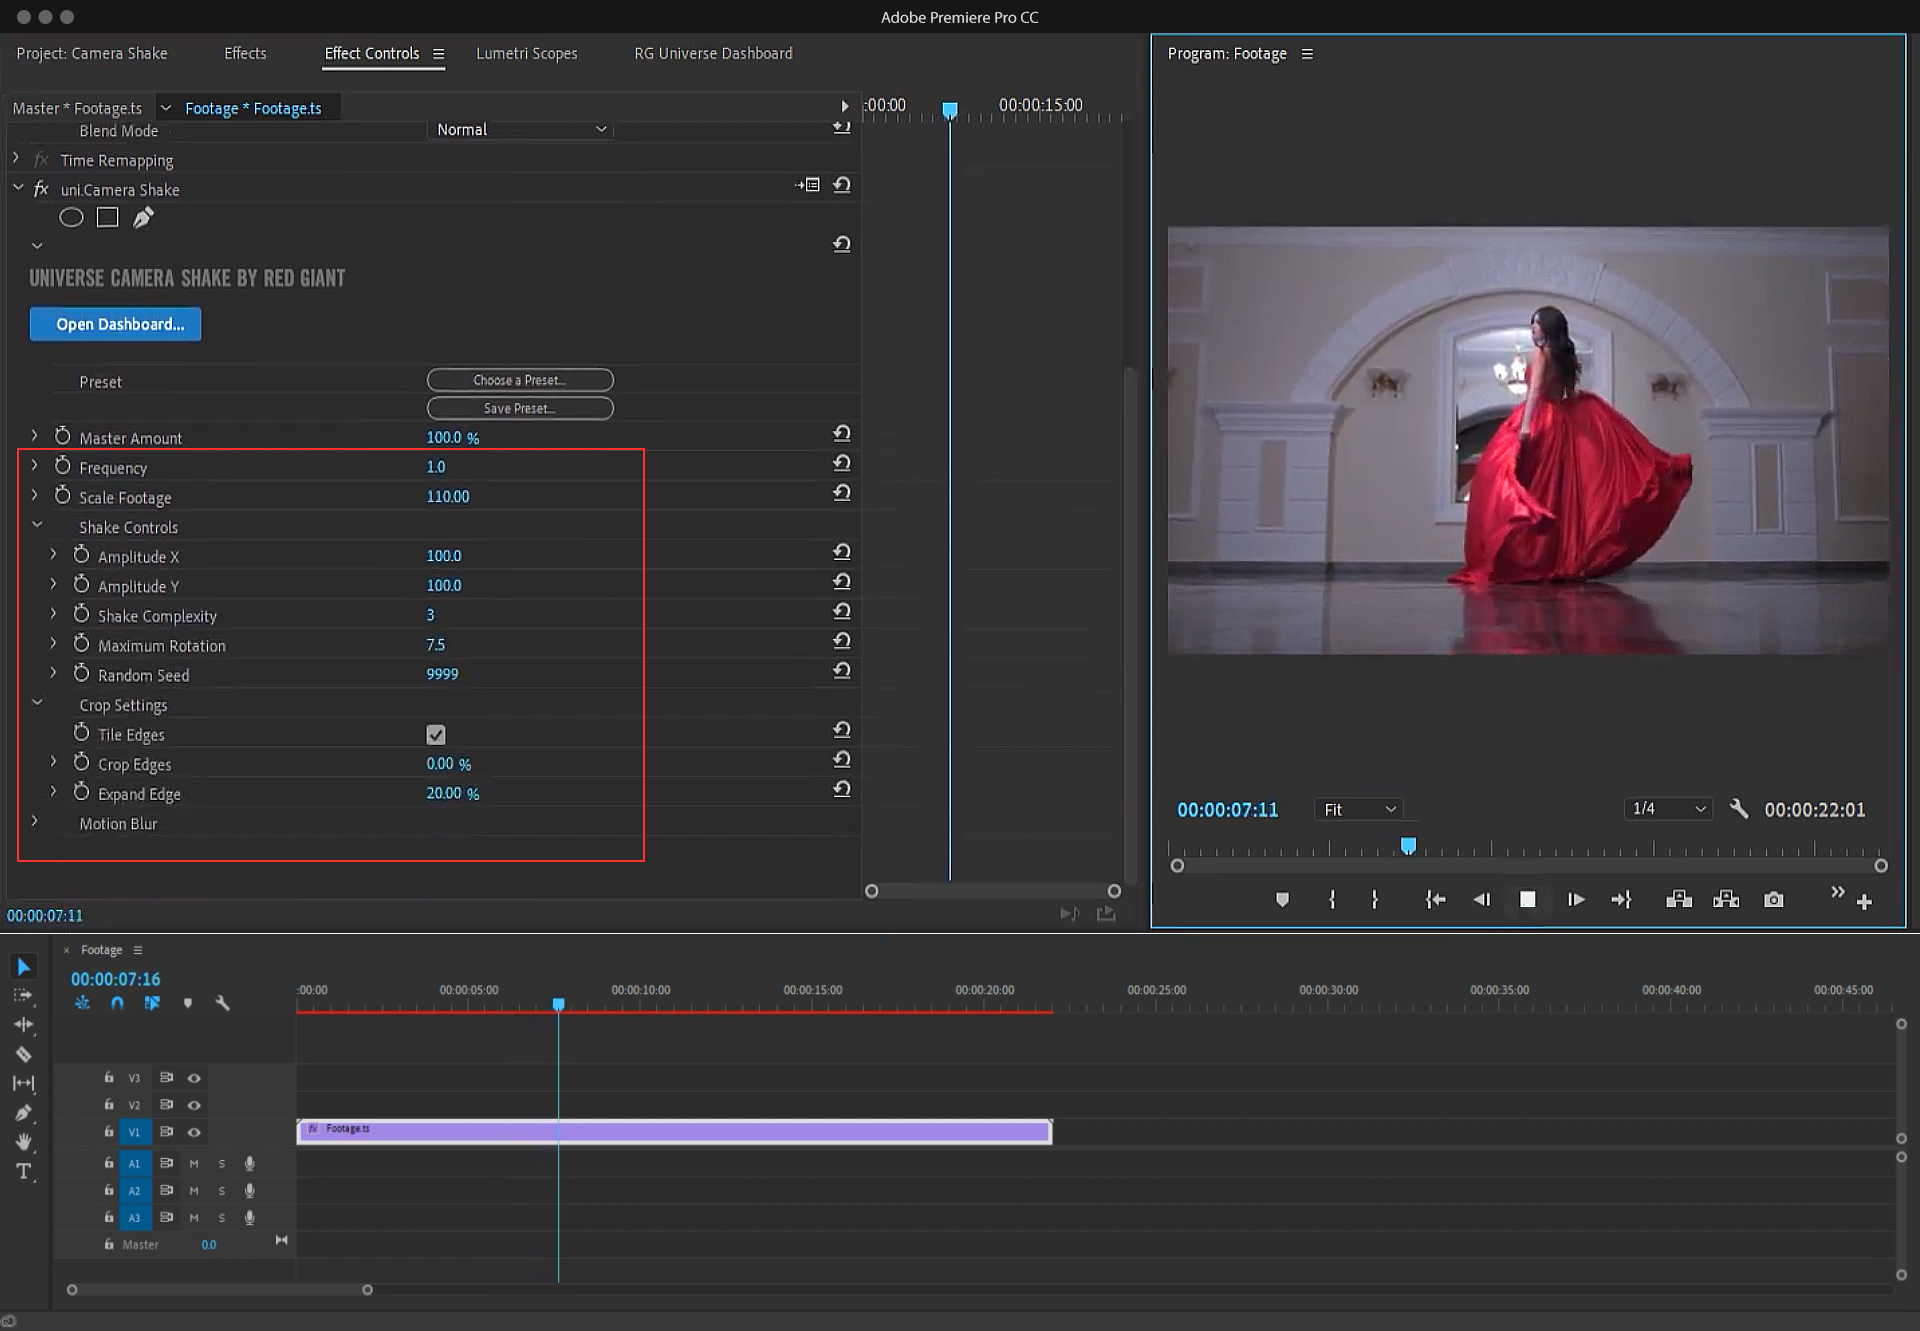
The effect is already applied and in many cases, the job is done here but if you want to have more control over the style of your shakey camera, you can then go to Effect Controls panel and find all the settings under “Universe Camera Shake by Red Giant”. Here you can change things like the frequency of shake and the amount you are ok with for the footage to be cropped in by scaling. Even more detailed settings are accessible by opening the “Shake Controls” and “Crop Settings”. Working with the settings here is totally dependent on the style and feel you are seeking for your video, so working with them all and experiencing the resulting effects for yourself is something I can not suggest more! The same goes for all the methods suggested in this blog!
Universe-Camera-Shake-by-Red-Giant”
In Effect Controls panel all the settings are under “Universe Camera Shake by Red Giant”

0 0 votes
Article Rating
Subscribe
Notify of
guest
0 Comments
Inline Feedbacks
View all comments