Today, DJI is one of the biggest players in this field and its latest addition to the market, Mavic 2 Pro, is the one we are going to talk about today. To be honest, Mavic 2 Pro and its other sibling, Mavic 2 Zoom, are almost a year old now, but when it comes to consumer-grade drones, these two are almost unbeatable.
DJI Mavic 2 Pro
Mavic 2 has a huge resemblance to OG Mavic, but taking a closer look at Mavic 2 will show the differences and the biggest one is the addition of tons of new sensors! Mavic 2 has 360 awareness of its surroundings so that it is almost impossible to crash it, ALMOST! Please never try to challenge it!
Sensors
What you get is two sensors up front, two in the back, one on each side, and three on the bottom. You also get landing lights under the Mavic 2 that will light up at night when you are landing. Cool feature! All these sensors are constantly scanning the surroundings, keeping the drone from crashing.
Camera
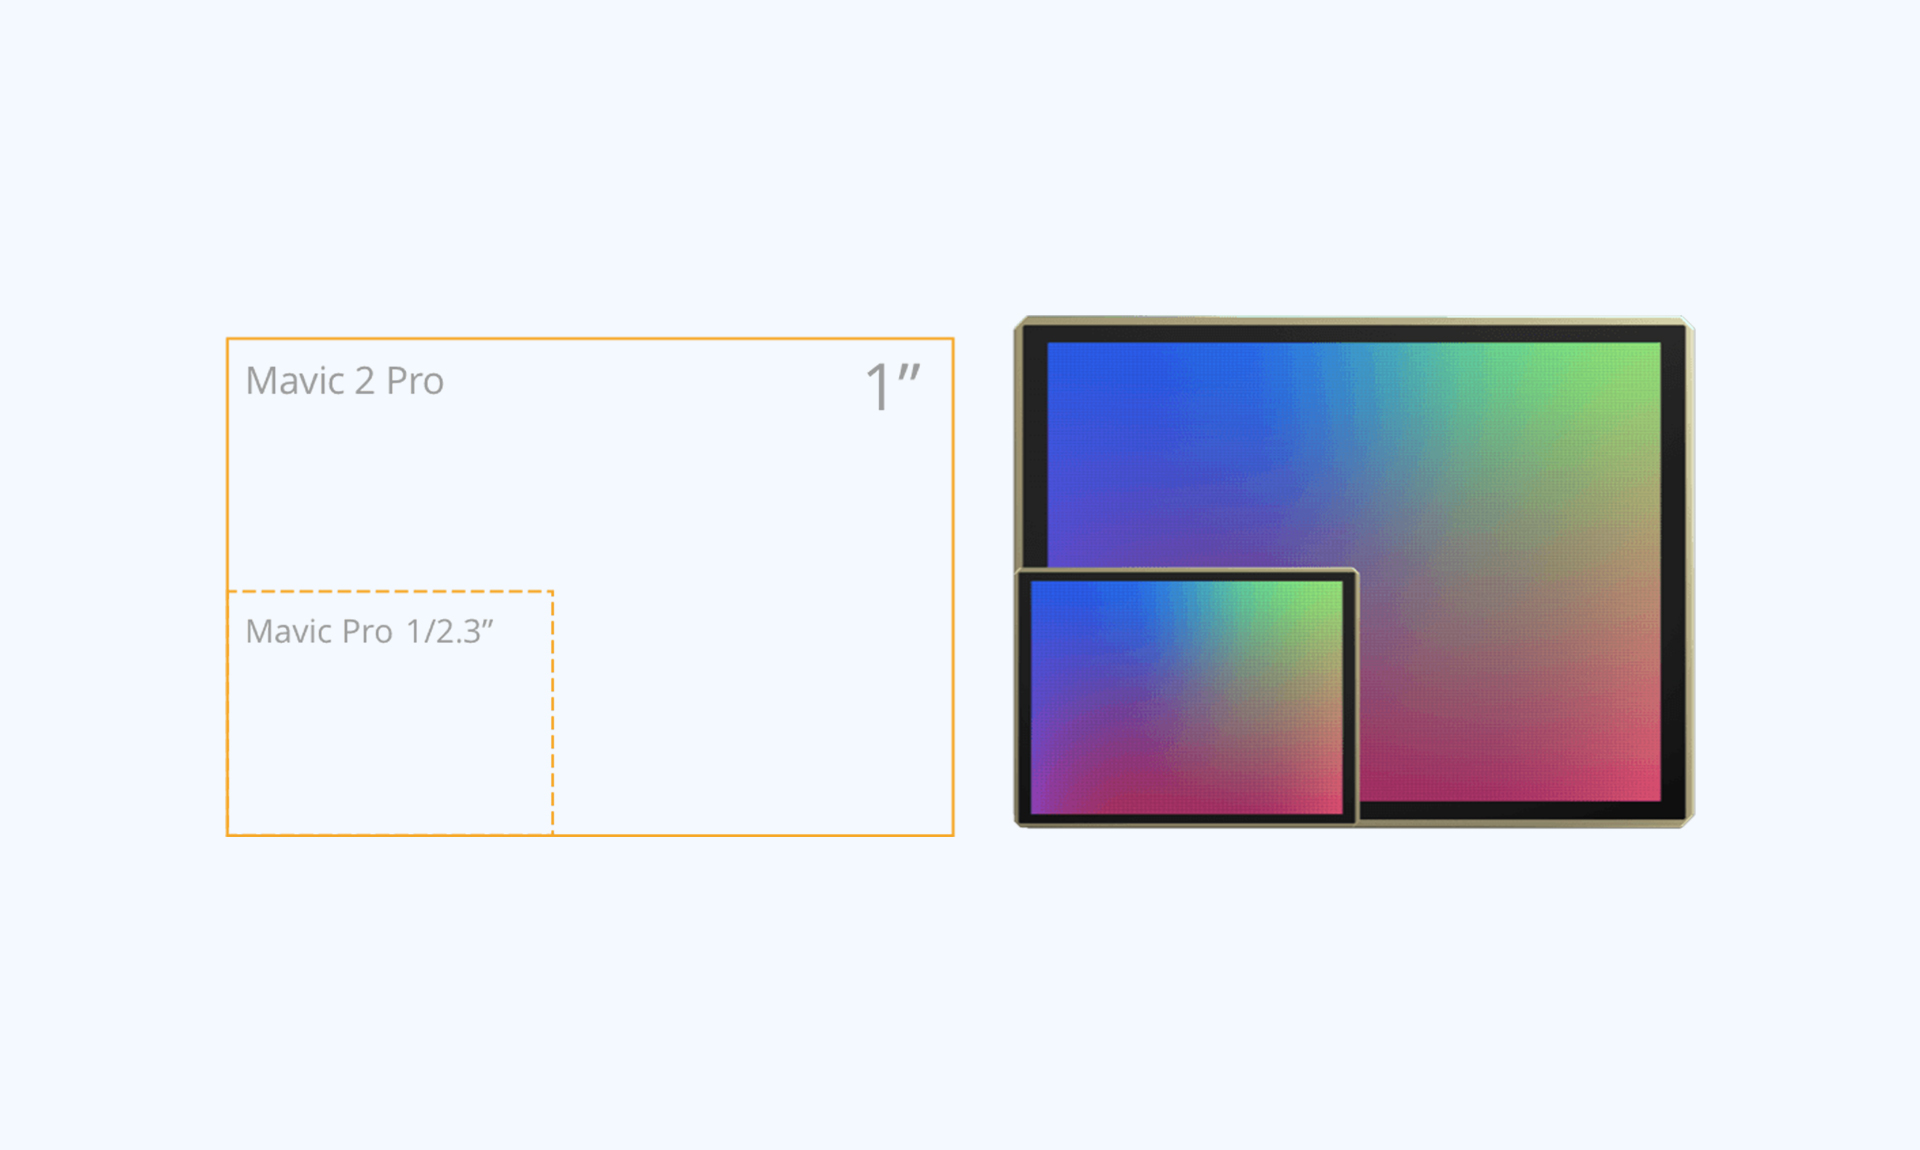
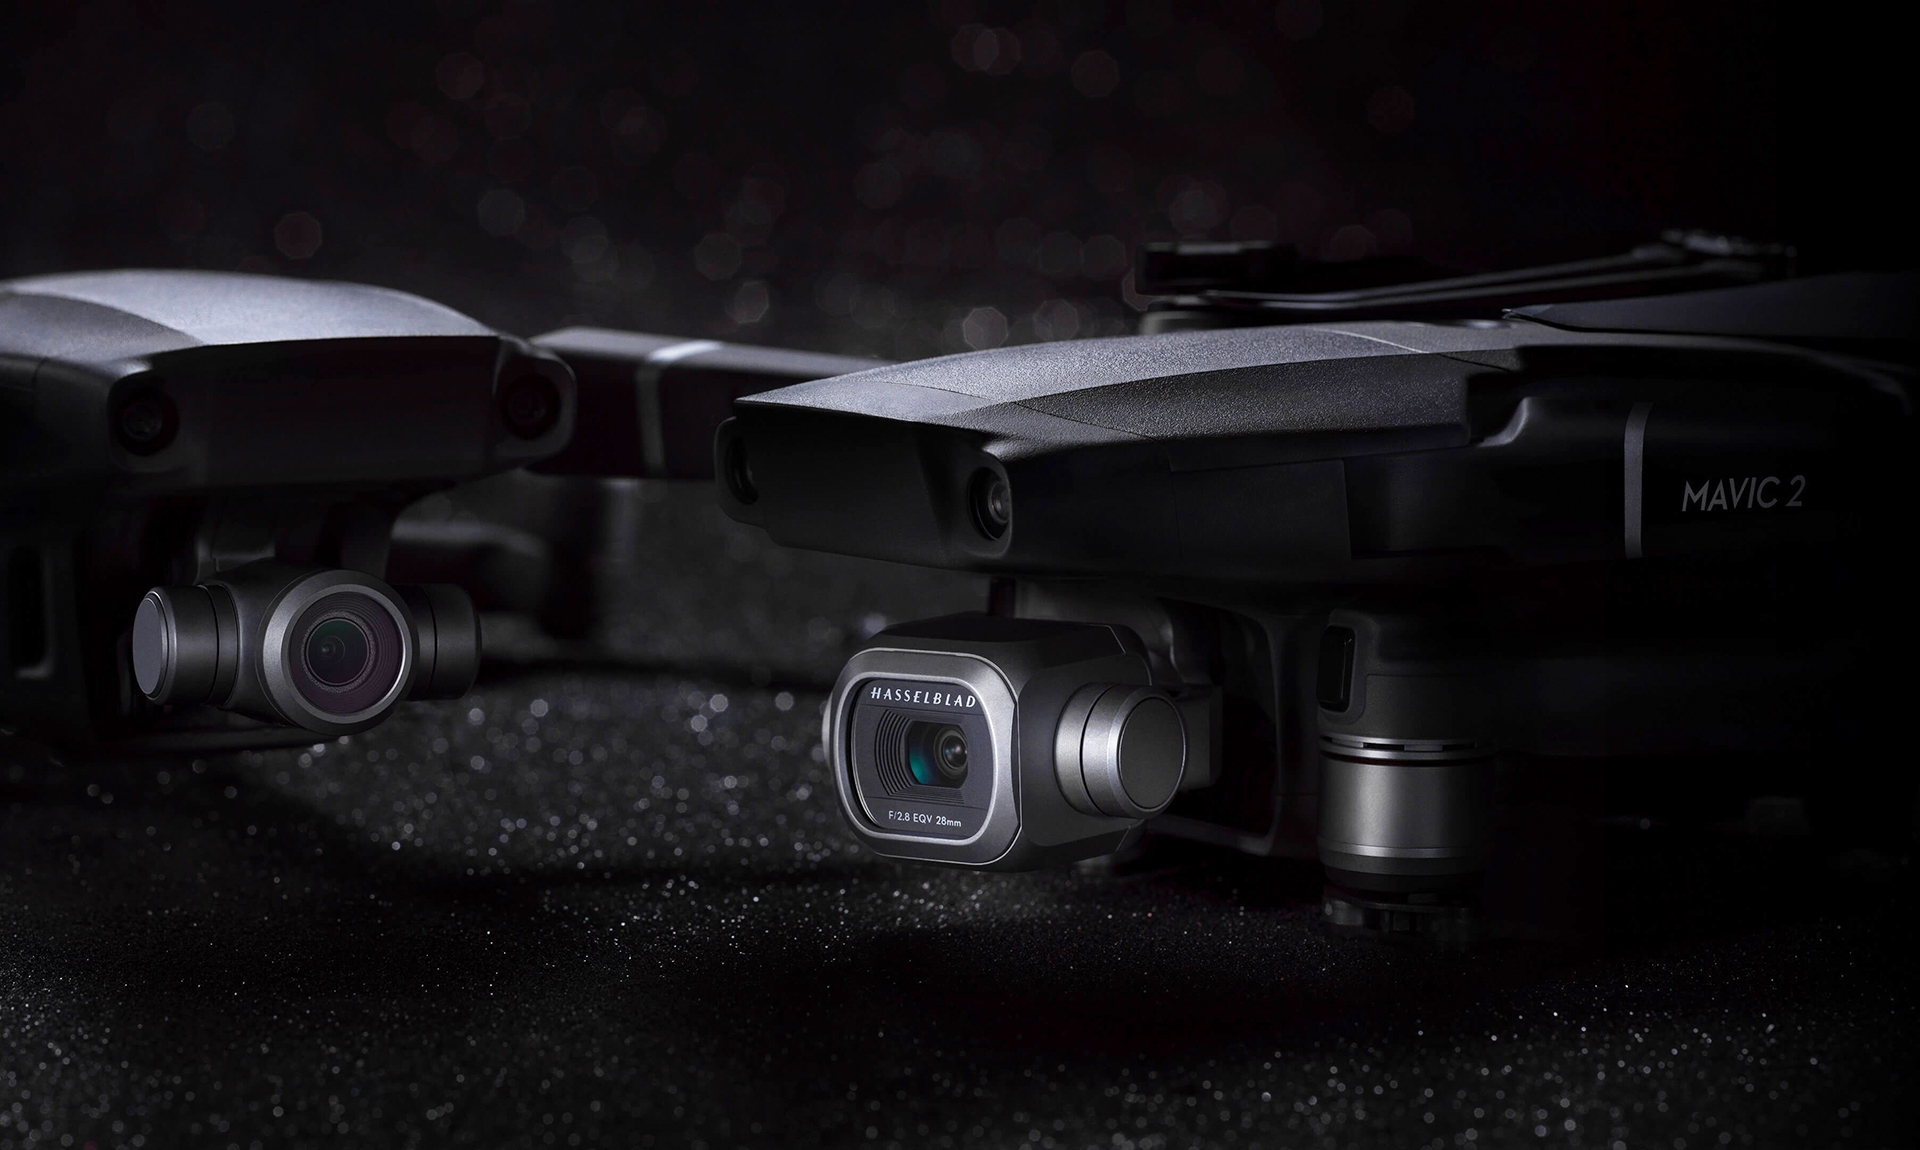
The next distinctive part of the Mavic 2 Pro is its amazing 1 inch Hasselblad sensor. This section is the only distinction between Pro and Zoom. Mavic 2 Zoom has a 1/2.3 inch sensor and it is not a Hasselblad sensor but it can zoom between 24 to 48mm. The gimbal on Mavic 2 is also amazing and can easily give you steady shots from the sky in almost any condition.
Foldable Design
Installing Mavic 2 Propellers
Battery
Mavic 2 Ports and IO
Mavic 2 Controller
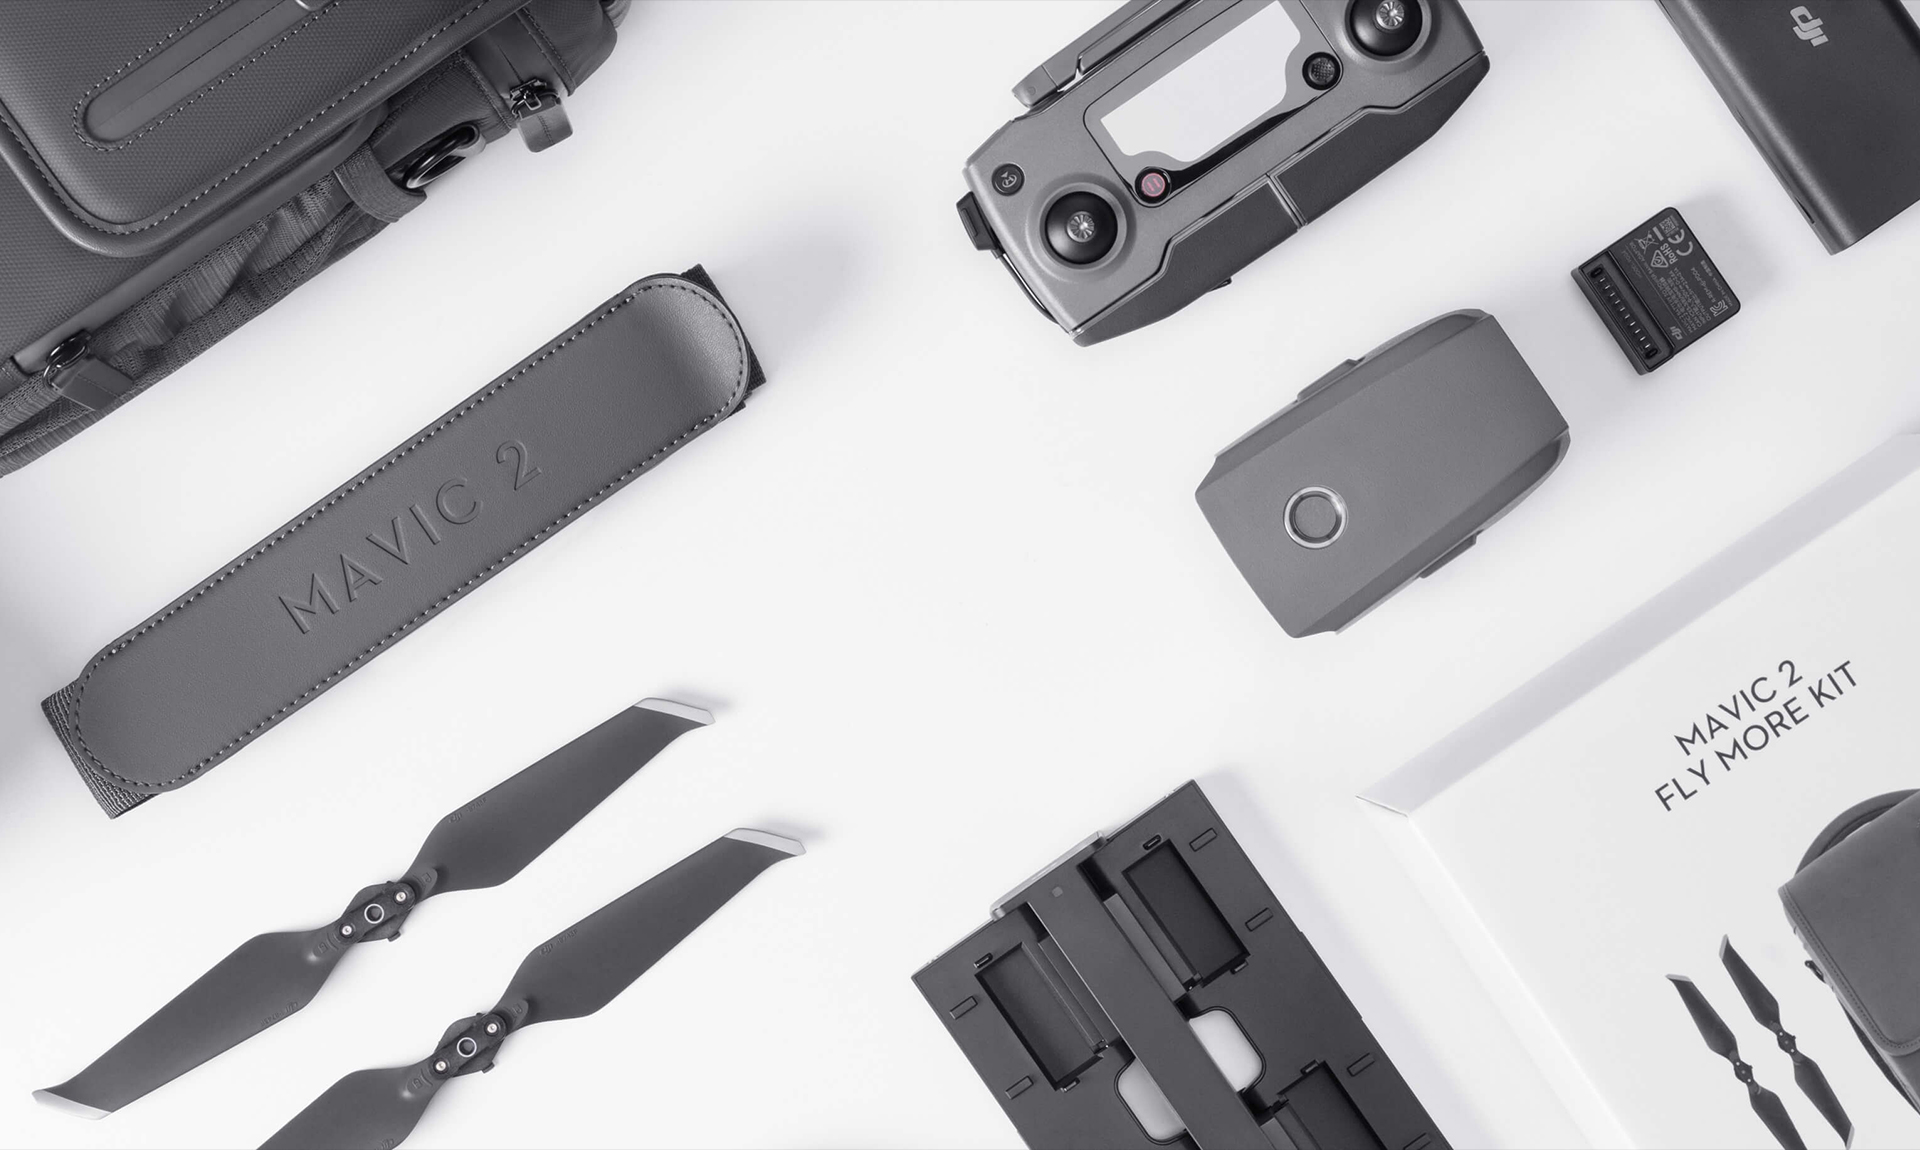
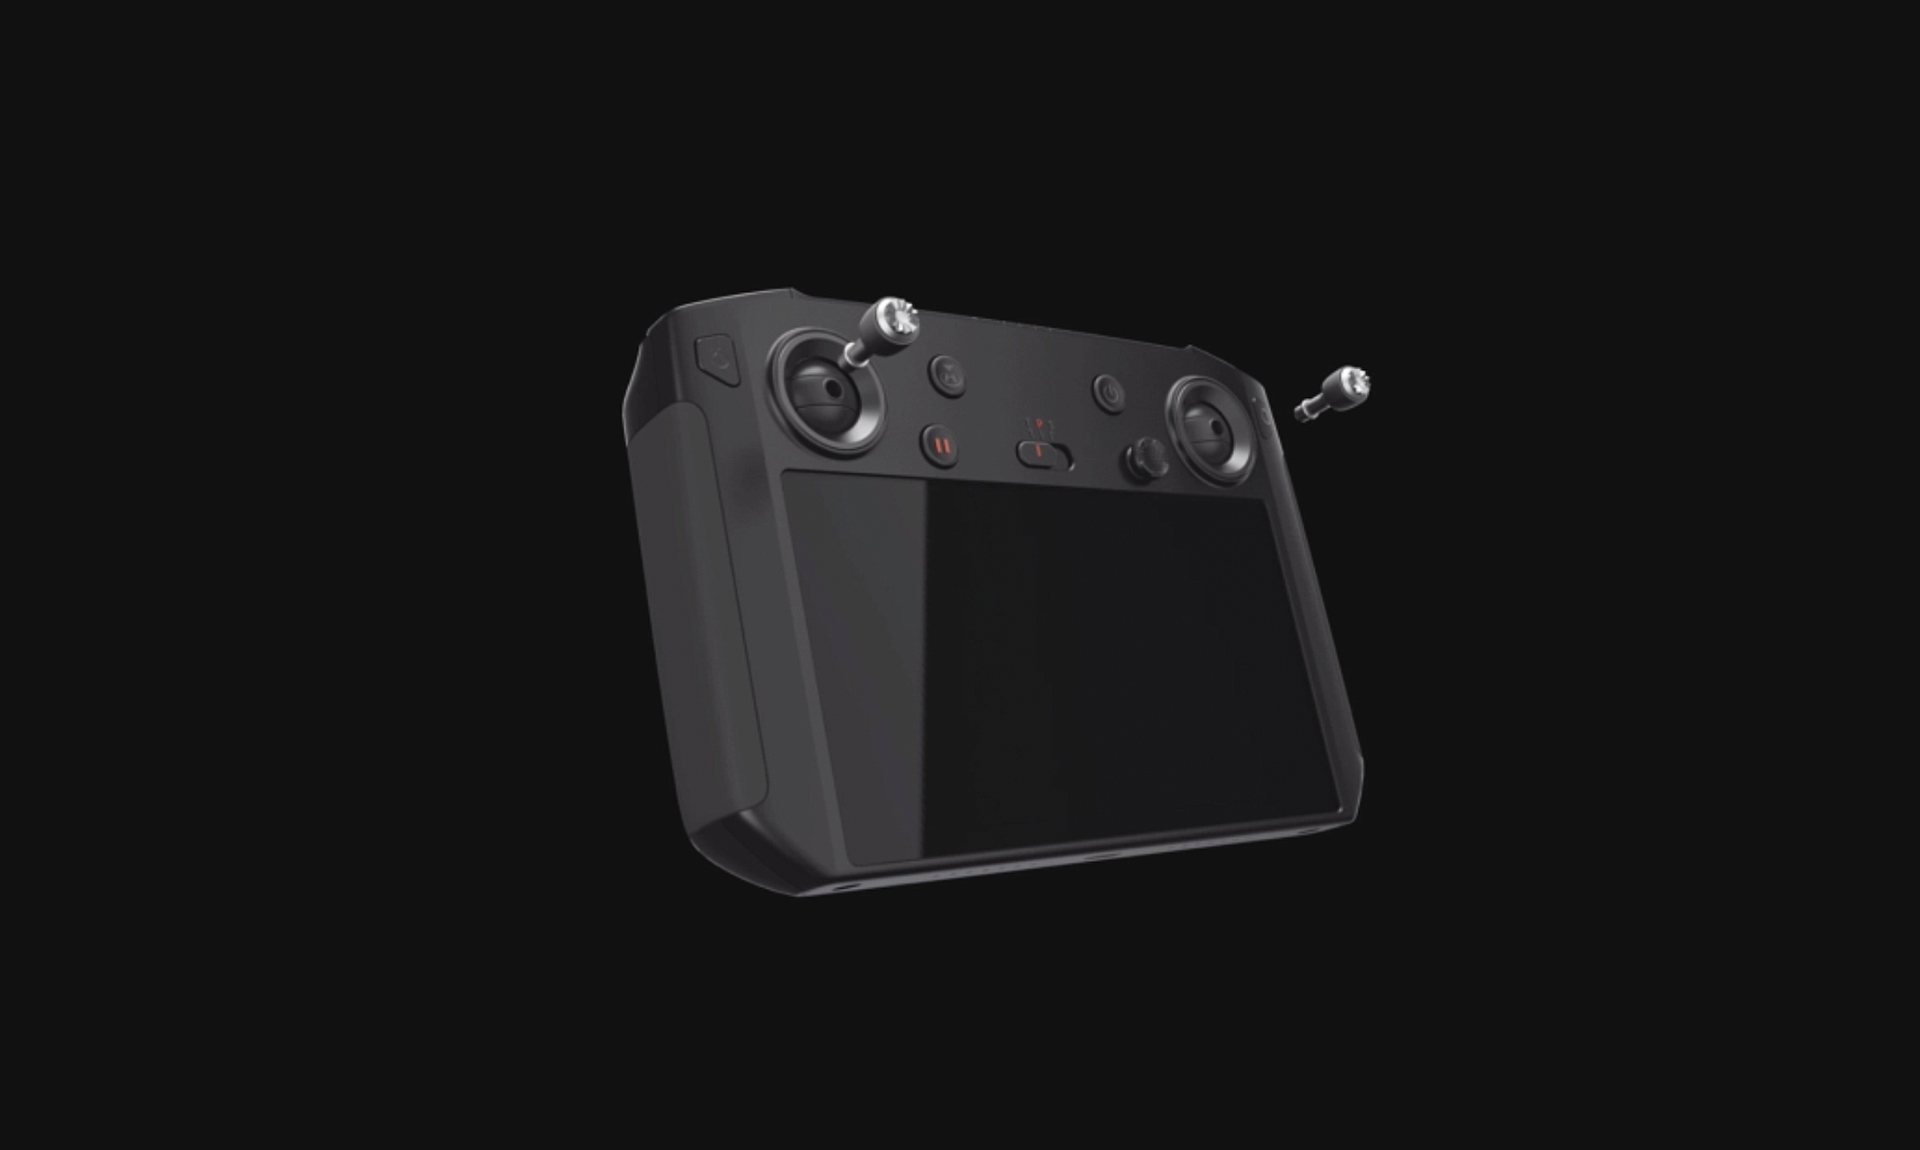
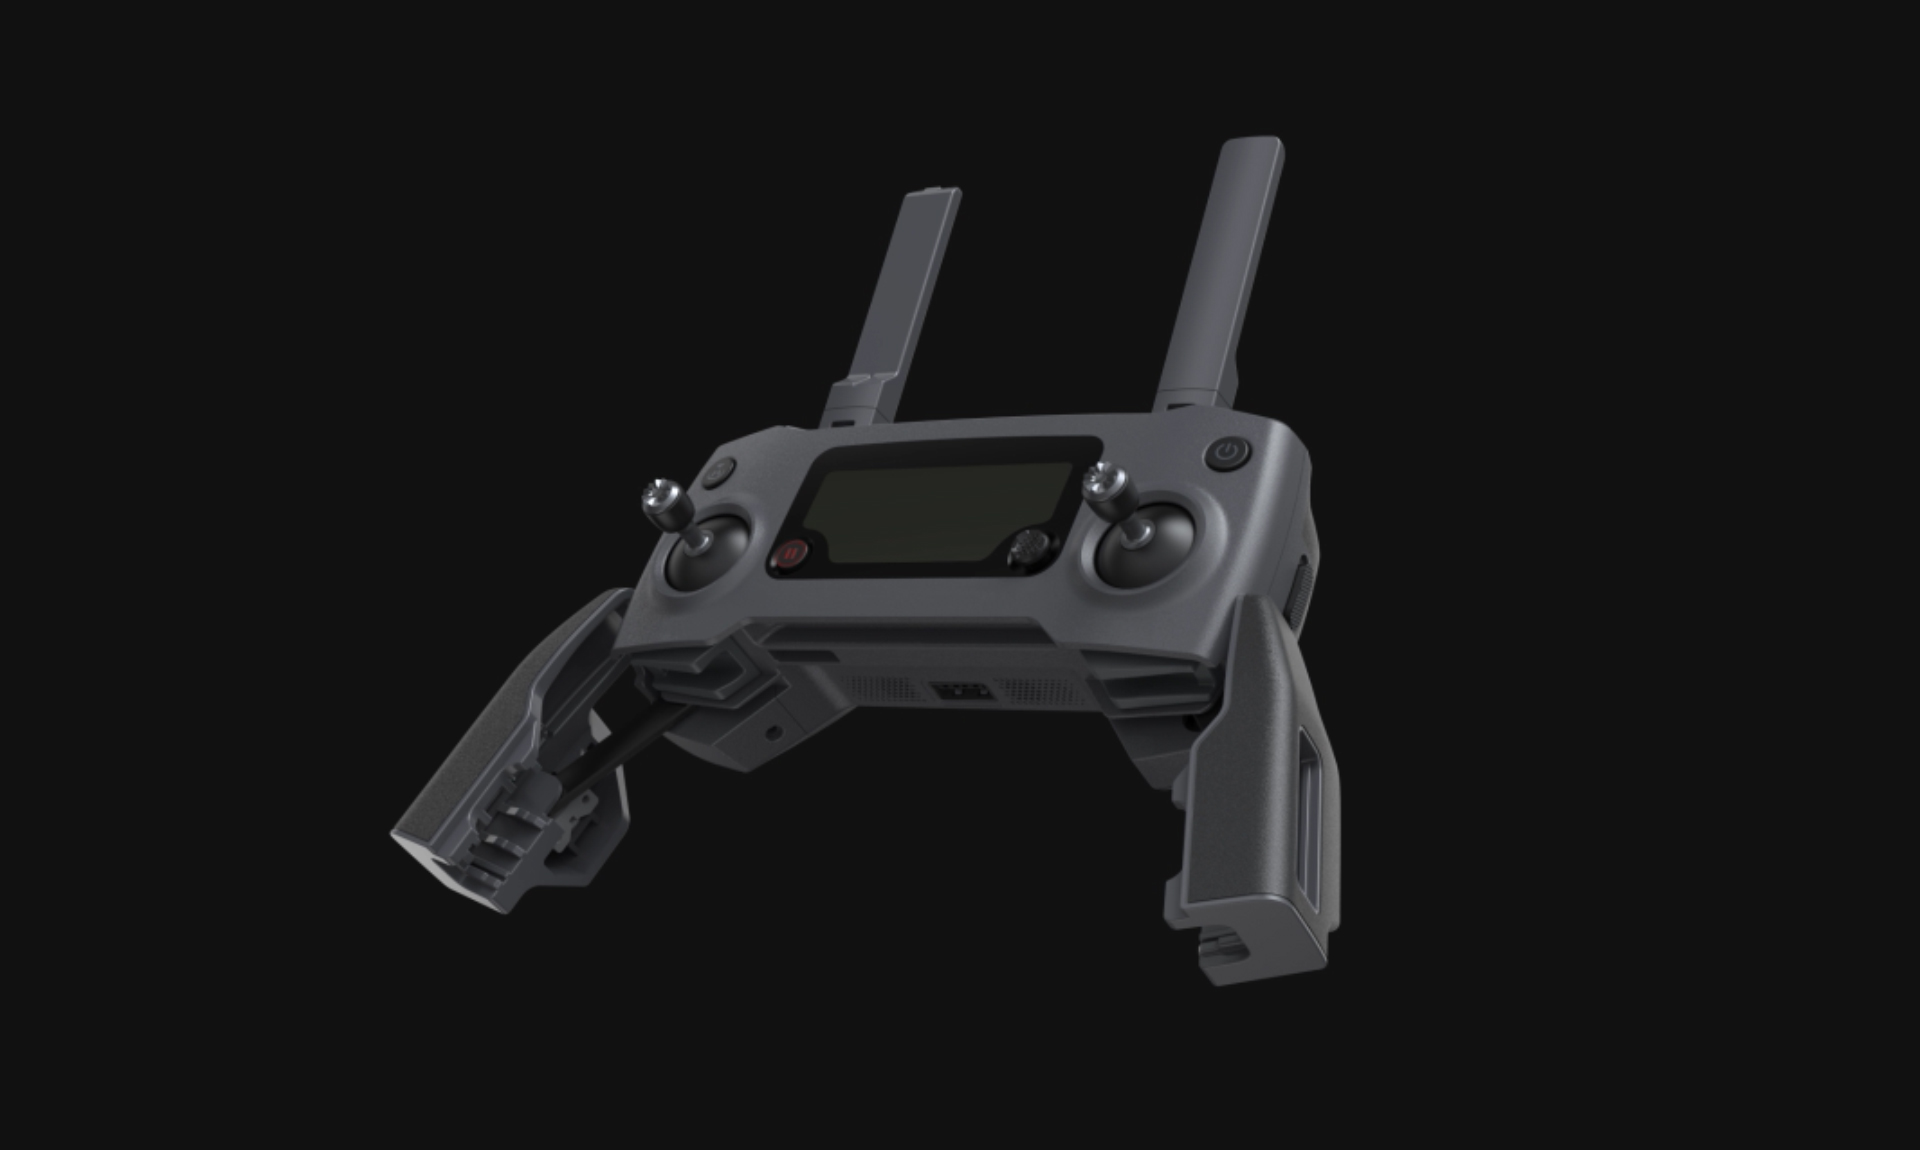
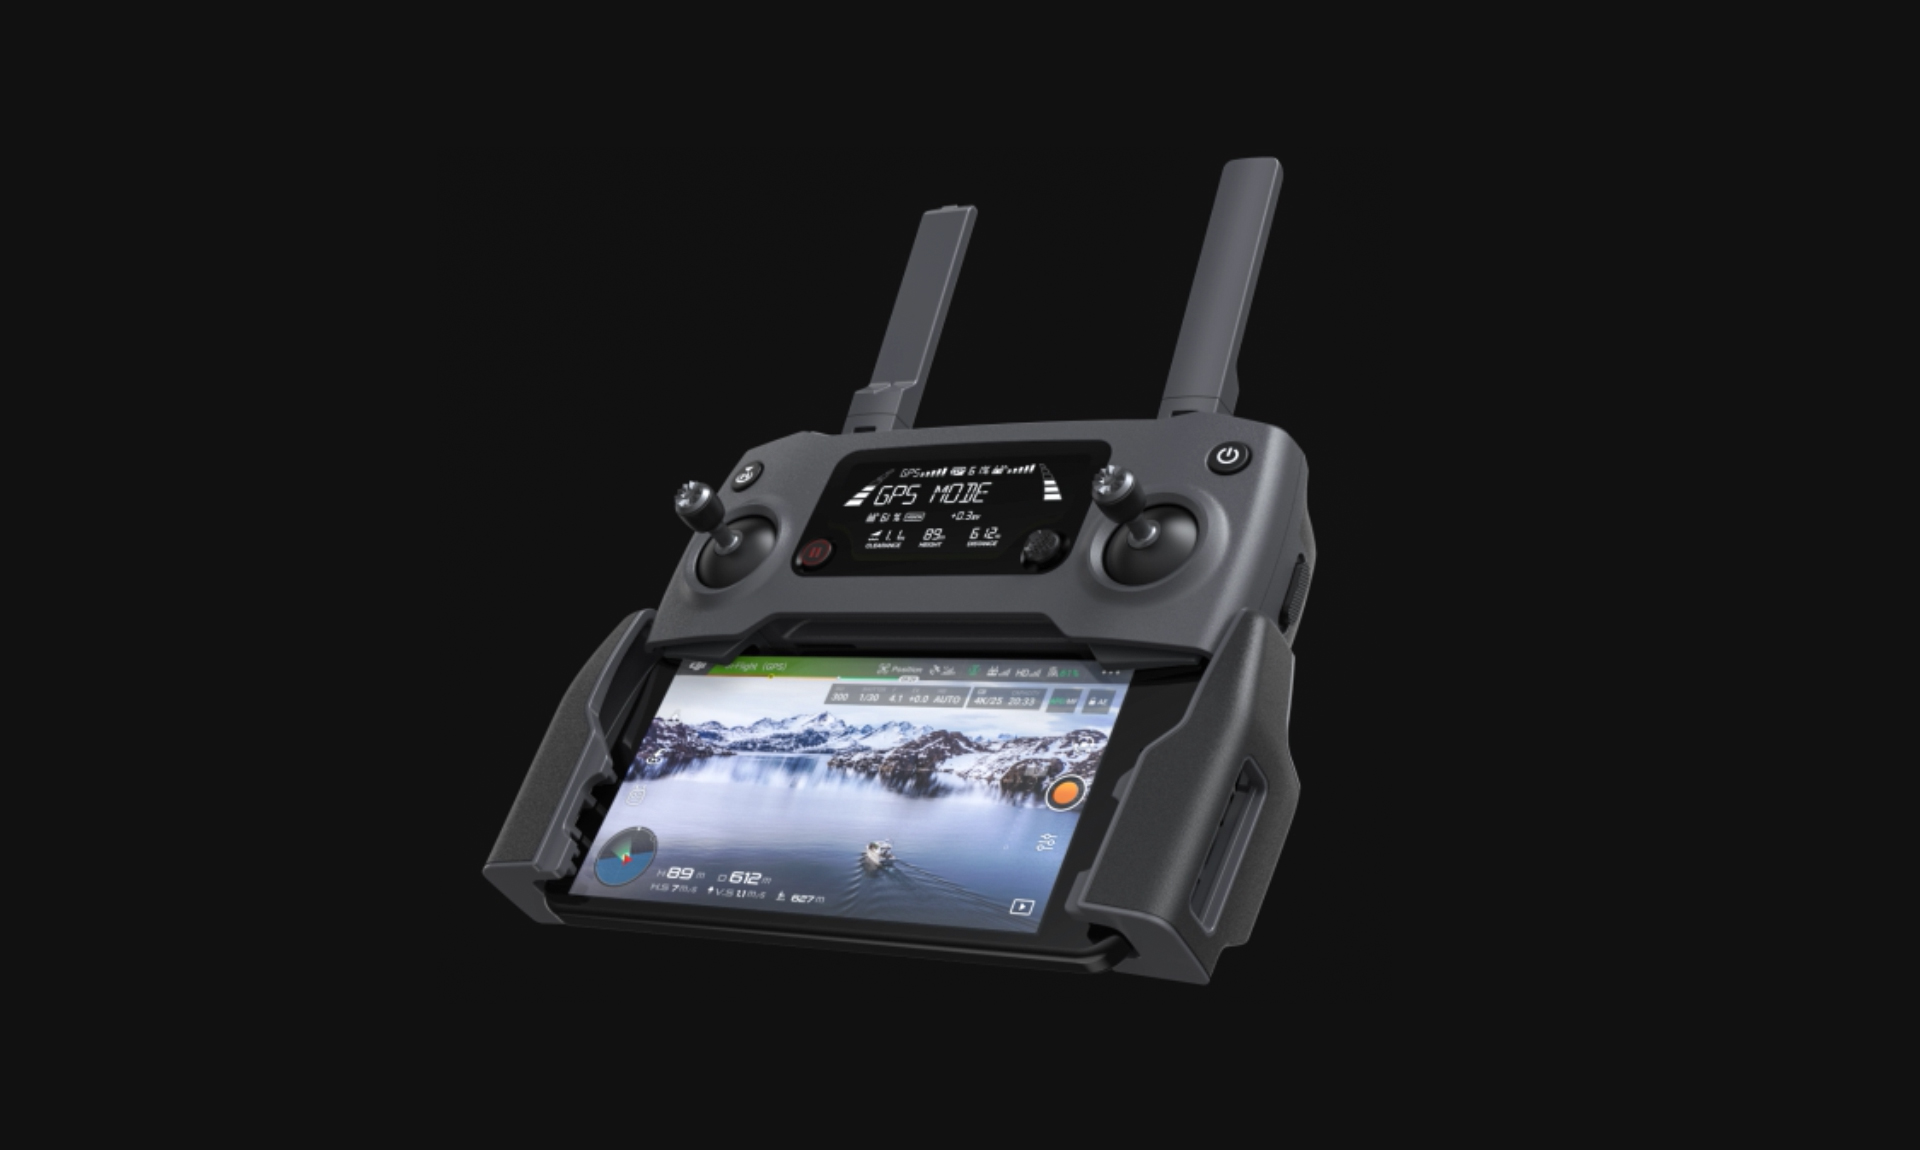
OK, let’s check the controller out. First in order to get it up and running, you should open the bottom portion of the controller like two wings. Here you will find the two thumbsticks that will screw on the controller. The two handlebars which we already opened will work both as a grip handle and also as a smartphone grip. You can see on the left one you will be able to connect your smartphone to the controller using the provided cable. Lightning, Type-C, and Micro USB are all included in the package.
If you want to connect with something bigger like an iPad, you can use the USB type-A on the top left corner to connect the controller to your device. This USB port is also used for charging the controller. To do so, just unplug the cable and plug in the charger. Easy peasy!
On top of the controller are the antennas that are hinged and will unfold. Always make sure Mavic 2 and the antennas are having a direct and unobstructed line of sight because that will give you the most optimal connection and best flying experience.
Controller Configuration
Let’s talk about the Mavic 2 controller buttons. The one on the top left is the Return to Home button. Long pressing this one will tell your drone to return back to you. All you have to do is set the home point in the app before you take-off. You can either choose the point of take-off or the position of your remote control as the returning point.
On the bottom left corner of the screen is a red pause button. When you are in the midst of any type of automated flight, pressing this button will put everything in halt and the drone will stop mid-air. It is a good safe button for the times when something suddenly goes out of control like a sudden rush of wind or running to an obstacle you haven’t noticed before.
To the right of the pause button is a D-pad style knob that you can program to your liking. Set every direction to a function you find useful. For example, one function I like to set is the exposure control so that I can move it up and down mid-flight.
Moving to the back of the controller, you see two shoulder buttons. One is to start shooting videos and the other one is for taking pictures. Simple and easy. Below the shoulder buttons are two dials. The one on the left is for controlling the pitch of your camera gimbal. So using it you can easily look up and down the field without any hassle and since the dial is spring loaded, the moment you let go, it will move back to its initial position. The other dial on the right is for controlling your aperture and your shutter speed. Finally, we have two buttons known as C1 and C2. These two are also customizable buttons so you can set them to any function you prefer.
Connecting Phone to Mavic 2
Now that’s all out of the way, let’s connect everything together and see what is up! Your phone will connect to the controller through the provided cable. Then you should run the DJI Go 4 on your phone. One thing that you may see constantly is the update prompt. DJI sends new updates for its Drone, Controller, AND battery constantly! It may be annoying but it also means DJI is caring for its products and keeps working on making them even better.
After all the updates are done, you will see that the device connected sign will appear and you can select Go Fly.
Flight Control Panel
Let’s go through all the things you see in your flight control panel one by one. At the top corner is the DJI logo that simply works as your home button that will send you back to the homepage of the app. To the right of the DJI logo is the situation of your drone. When you go outdoors and all the connections are OK, it will tell you when it is ready to fly. Keeping on going right you will have the drone position, the GPS signal and the number of satellites it is connected to, the readout of the drone sensors which will give you some awareness of your surroundings. Next in line is the quality of the connection between the controller and the drone. Then is the signal quality of the camera uplink to your device. And finally, the last one is the drone battery.
Below these icons are the settings for the camera which are all obvious. Things like camera ISO and shutter speed, typical stuff. The only two that may need explanation are AE which is the exposure setting that you can either make auto or lock it to the desired setting. Next to that is the auto-focus button which can be either auto or manual.
On the left side of the screen, you see 4 buttons. The top one is the take-off prompt. Tapping it will show the pop up for the take-off. If you are ready for take-off just slide the slider and the drone will take care of the take-off process all by itself.
Below the take-off button is the Return to Home button which we have already got familiar with. Tap it and the drone will get back to you or your designated location.
Next in line is the automated flight modes which I will talk about in a moment.
Next is the APAS that is your obstacle avoidance system. Of course, this feature is reassuring, but never try to challenge it! The bottom of the screen is like the gauge cluster of a car. You have your compass, a live map which you can tap and see it in full view, the distance between the drone and you, the height your drone is flying at, your horizontal and vertical speed, all the good stuff.
On the right side of the screen, are your camera options. It is just like a phone camera. The button with a play is your gallery which will show you all your photos and videos. Then you have the camera settings, your shutter button and then your camera switch button.
The slider is for controlling the pitch of your cameras. Slide it up and down to control your camera. The only thing left to talk about is the feature that many people actually buy drones for and that is the automation flight modes.
Automation Flight Modes
Hyperlapse
The first one is the hyper-lapse mode which comes in 4 variations. The free mode will let you move the drone freely in any direction while it is taking its pictures. The drone will move very slowly in this mode so that the final video will look smooth in its movement.
The circle is a fully automated hyper-lapse mode in which you will choose your subject of interest and then the drone will take pictures while slowly circling around the subject. To my eyes, this is one of the coolest flight mode!
The next mode is the course lock. In this mode, you will choose the duration of your final video, set the orientation of the drone, and then it will automatically move forward and take pictures.
The final hyper-lapse mode is the waypoint. This mode can help you do some amazing creative stuff. The way it works is that you will set your waypoints before hands and then the drone will follow them while taking the pictures. I personally believe this mode has a lot of creative potentials and if you want to do some cool shots, you should definitely try it.
DJI Mavic 2 pro Hyper lapse Free Mode Sample
DJI Mavic 2 Pro Hyperlapse Circle Mode Sample
Quickshots
Moving on from hyperlapse modes, we are going to talk about Quickshots. These are some of the most famous shots you may have already seen in videos.
In Dronie mode you will set your subject beforehand and then the drone will move up and away from you to the maximum distance you have set for it.
The circle is also a simple one. You set your subject and the drone will circle around it. Simple and easy.
Helix is a bit similar to Circle but it will also move upward while circling around the subject.
The Rocket will lock on your designated target and move the drone upward. Like looking at the subject from an ascending rocket.
Boomerang is also a lot like Circle but instead of a round path, it will follow an oval path.
The final one is the Asteroid. In this mode, the drone will move away from you just like the Dronie mode, but in the end, it will create a fisheye image of you like you are on a small planet or an asteroid.
Active track
The next mode on the list is Active track which many drone owners look forward to. In this mode, you will set your subject in the software and then the drone will follow the subject wherever it goes. One thing you should keep in mind is that the subject must stay in view at all times or the drone will instantly lose track.
The second thing is that you have to keep the maximum speed of the drone in mind before setting a subject. Mavic 2 has a top speed of around 70 kph or 44 mph. So it can not follow a subject that is moving faster than that. And even this number is only achievable if you turn off the “Safe” button which will turn off the sensors and set the drone in the sport mode.
Mavic 2 has Active Track 2 which is an improvement over its predecessor in tracking and subject recognition.
The Profile Active Track mode has the ability to follow its subject from the side which is a good style for running shot for example.
The Spotlight Active Track mode will lock on the subject but will not automatically follow it. So you can either keep it that way or follow the subject yourself using the controls.
Point of Interest
Point of Interest is the next automated mode that works a lot like the Circle mode but in this one, you not only have a lot more precise and detailed control over the things like height and speed but also you can set the drone to use its sensors or GPS in order to have a better and safer movement around the subject.
Tapfly
Now we get to the Tapfly mode which is very simple but effective. This mode has three subcategories.
In Forward, you will set your waypoint and then the drone will move toward that. While this is going you will have control over changing the speed of your drone or change the waypoint and the drone will follow that.
The second one is Reverse which is self-explanatory and works the opposite of Forward.
The final Tapfly mode is Free. In this one after you choose your waypoint and starting to move toward it, you will have the freedom to change the direction the camera is looking at without changing the course of the drone.
Cinematic
The final Automated mode is Cinematic mode. What this mode does is that it will lower the agility and sensitivity of your drone and stick. This will make the camera movement much more smooth and eliminate the jerky camera stops at the end of each camera movement.

