Editing 4K Videos Faster on Low End Systems
Media Cache Files:
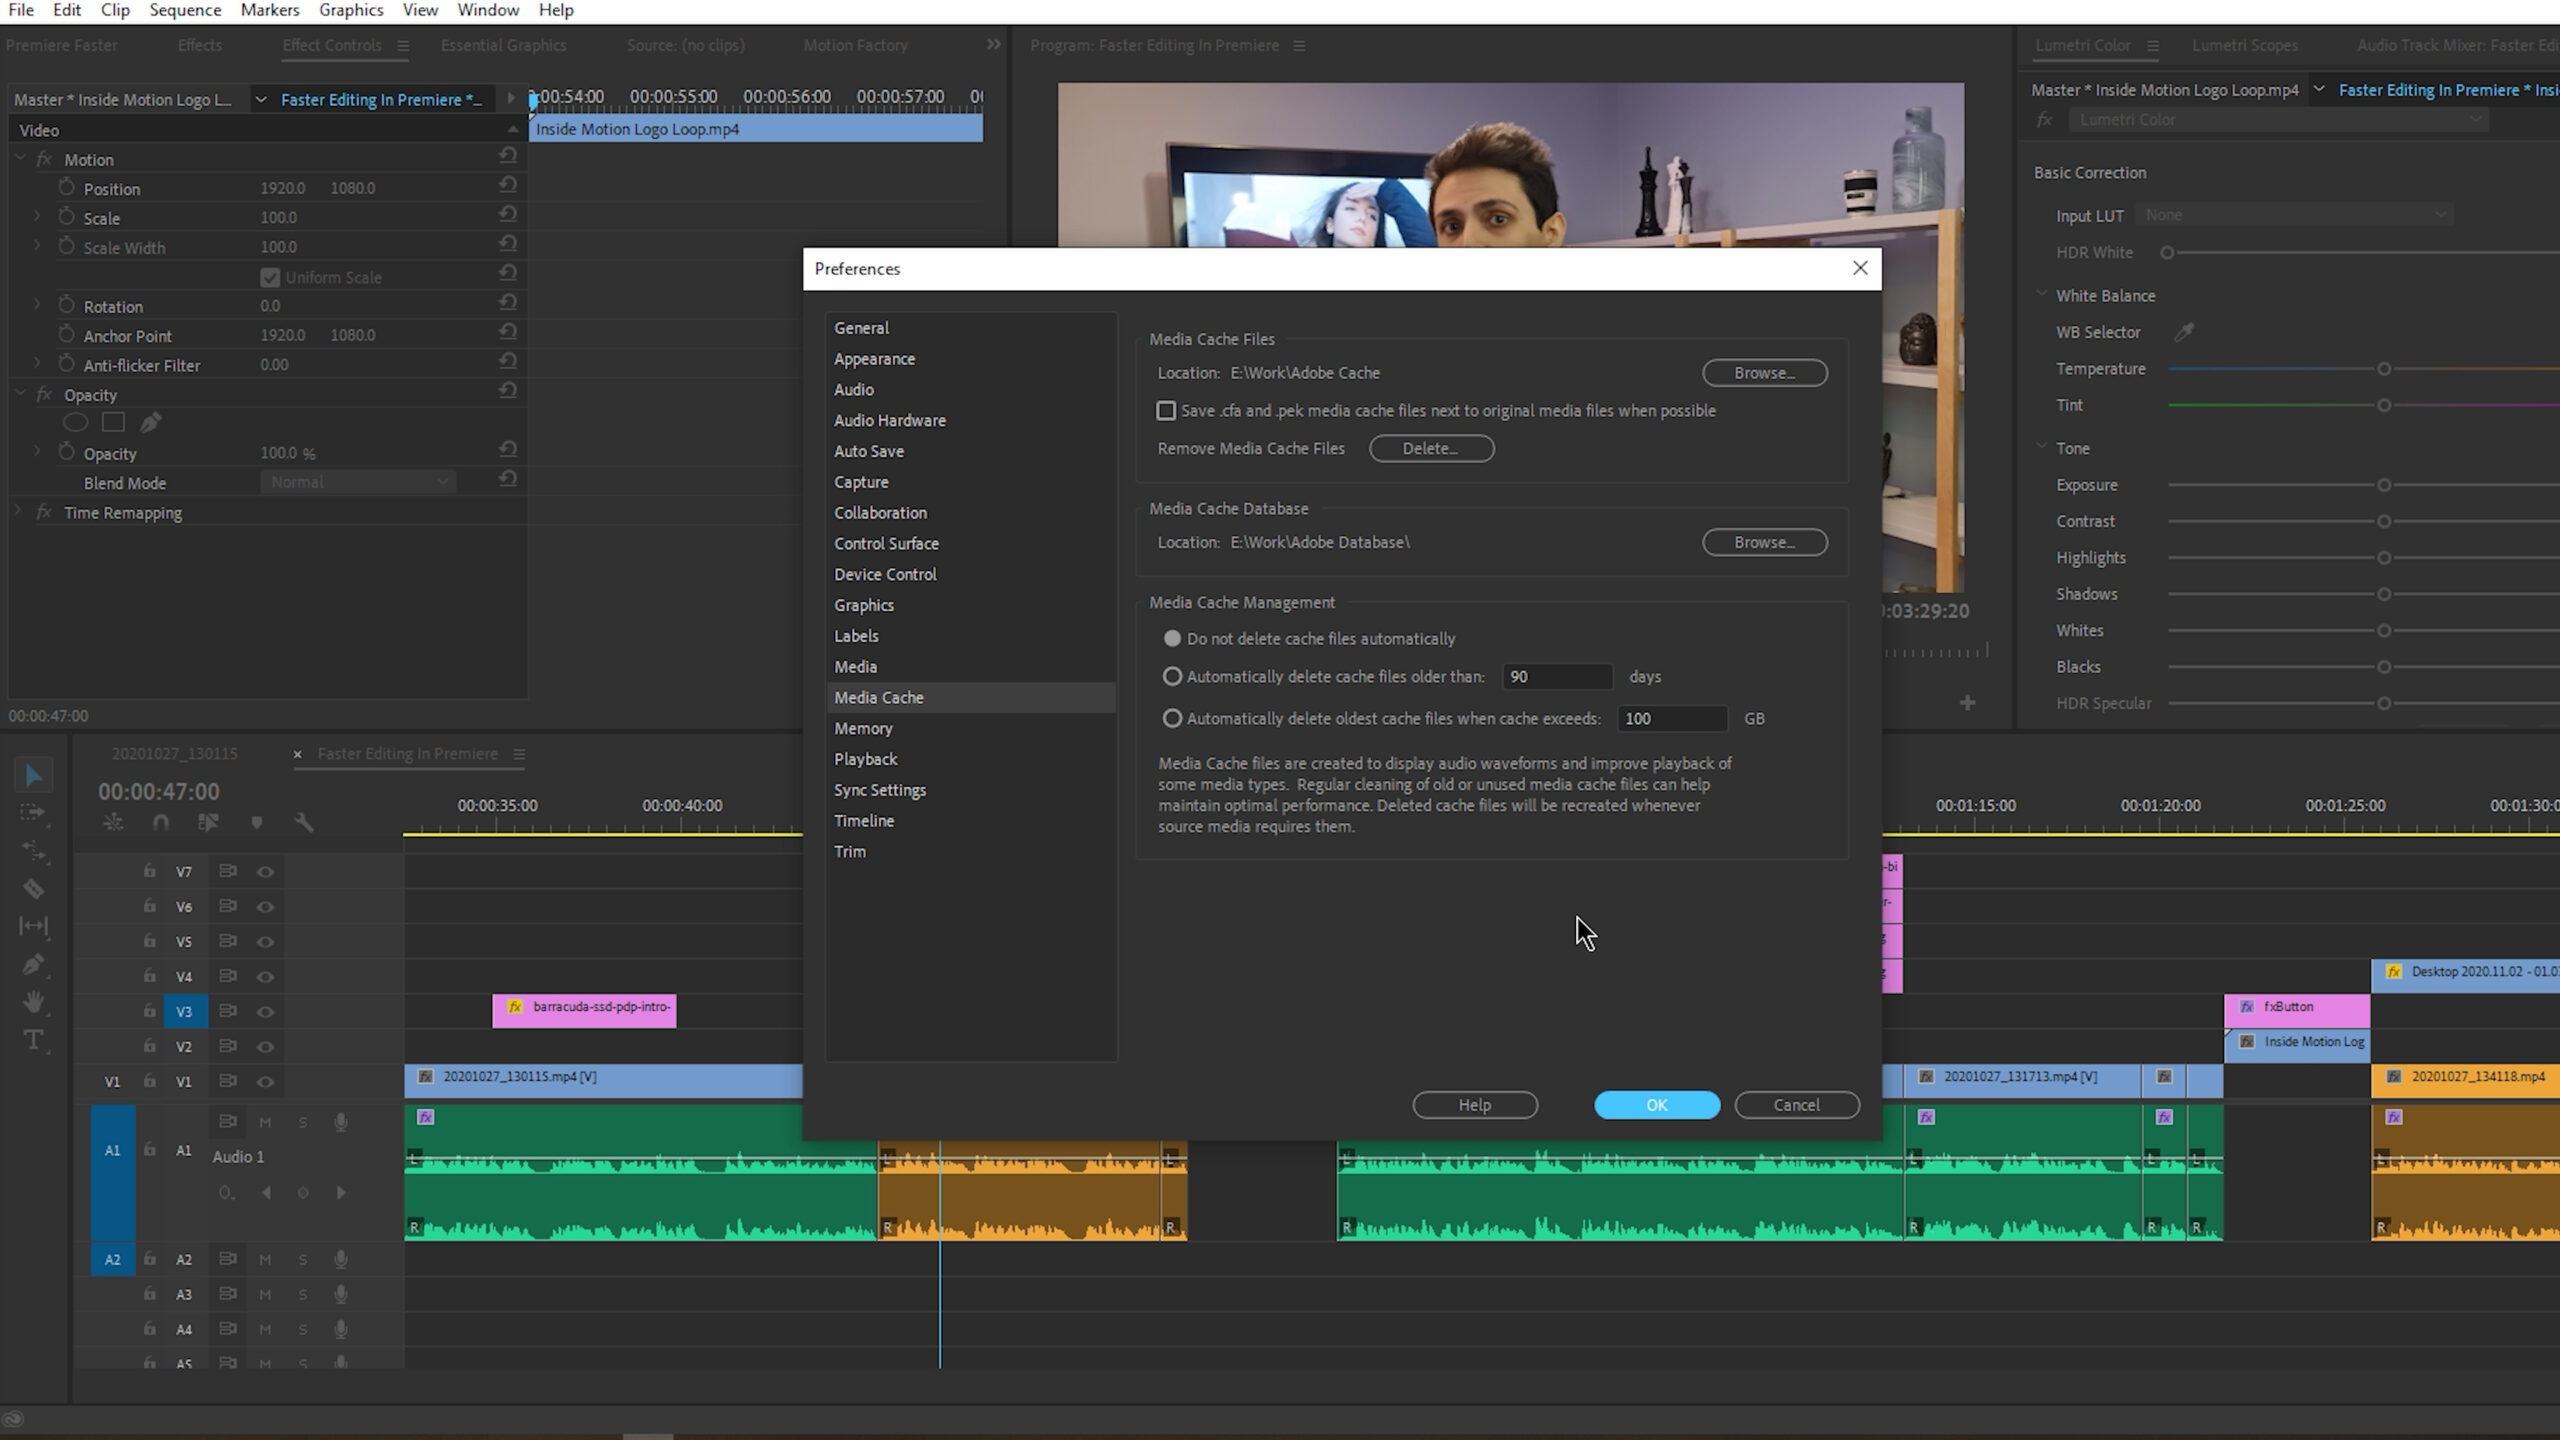
First, you gotta do is to set your media cache on your SSD. If you do not have an SSD, set the cache location on your fastest drive, and then go and buy an SSD! Clearing your cache files is also a very good solution. If your older projects are finished and you know you will not get back to them, then there is no need to keep the cache.
You can even schedule this. For example, you can set cache files to be deleted after 60 days or maybe after they reach 50GB. Try to evaluate your workflow and see what works for you best. “Media Cache” management can be accessed from the “Preferences”, under the “Edit” menu.
Memory Management:
RAM is the other component of your system that plays a great part in determining the speed of your applications. Some programs like Google Chrome, like to eat all of your RAM no matter how much you need it for your other works! So to speed up your premiere work you can increase your reserved RAM by closing other programs. In Windows, you can open Task Manager (Ctrl+Shift+Esc) to check up on which program is using how much RAM. On Apple Mac devices you can do the same by going to Activity Monitor in your Settings.
In Progress Playback:
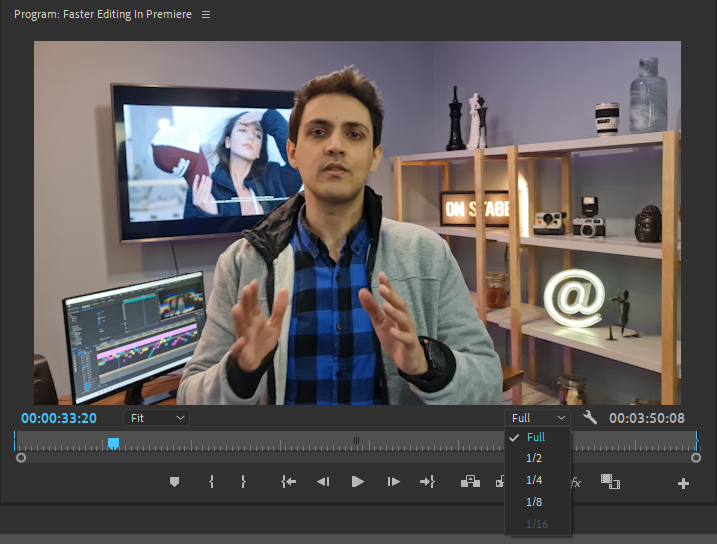
If you don’t want to use the Proxy, which I’m gonna talk about in a bit, your other option is to lower the playback resolution. You can lower it to half or even a quarter of the original, and don’t worry, it is just a playback thing and will not affect your actual video.
FX Mute Button:
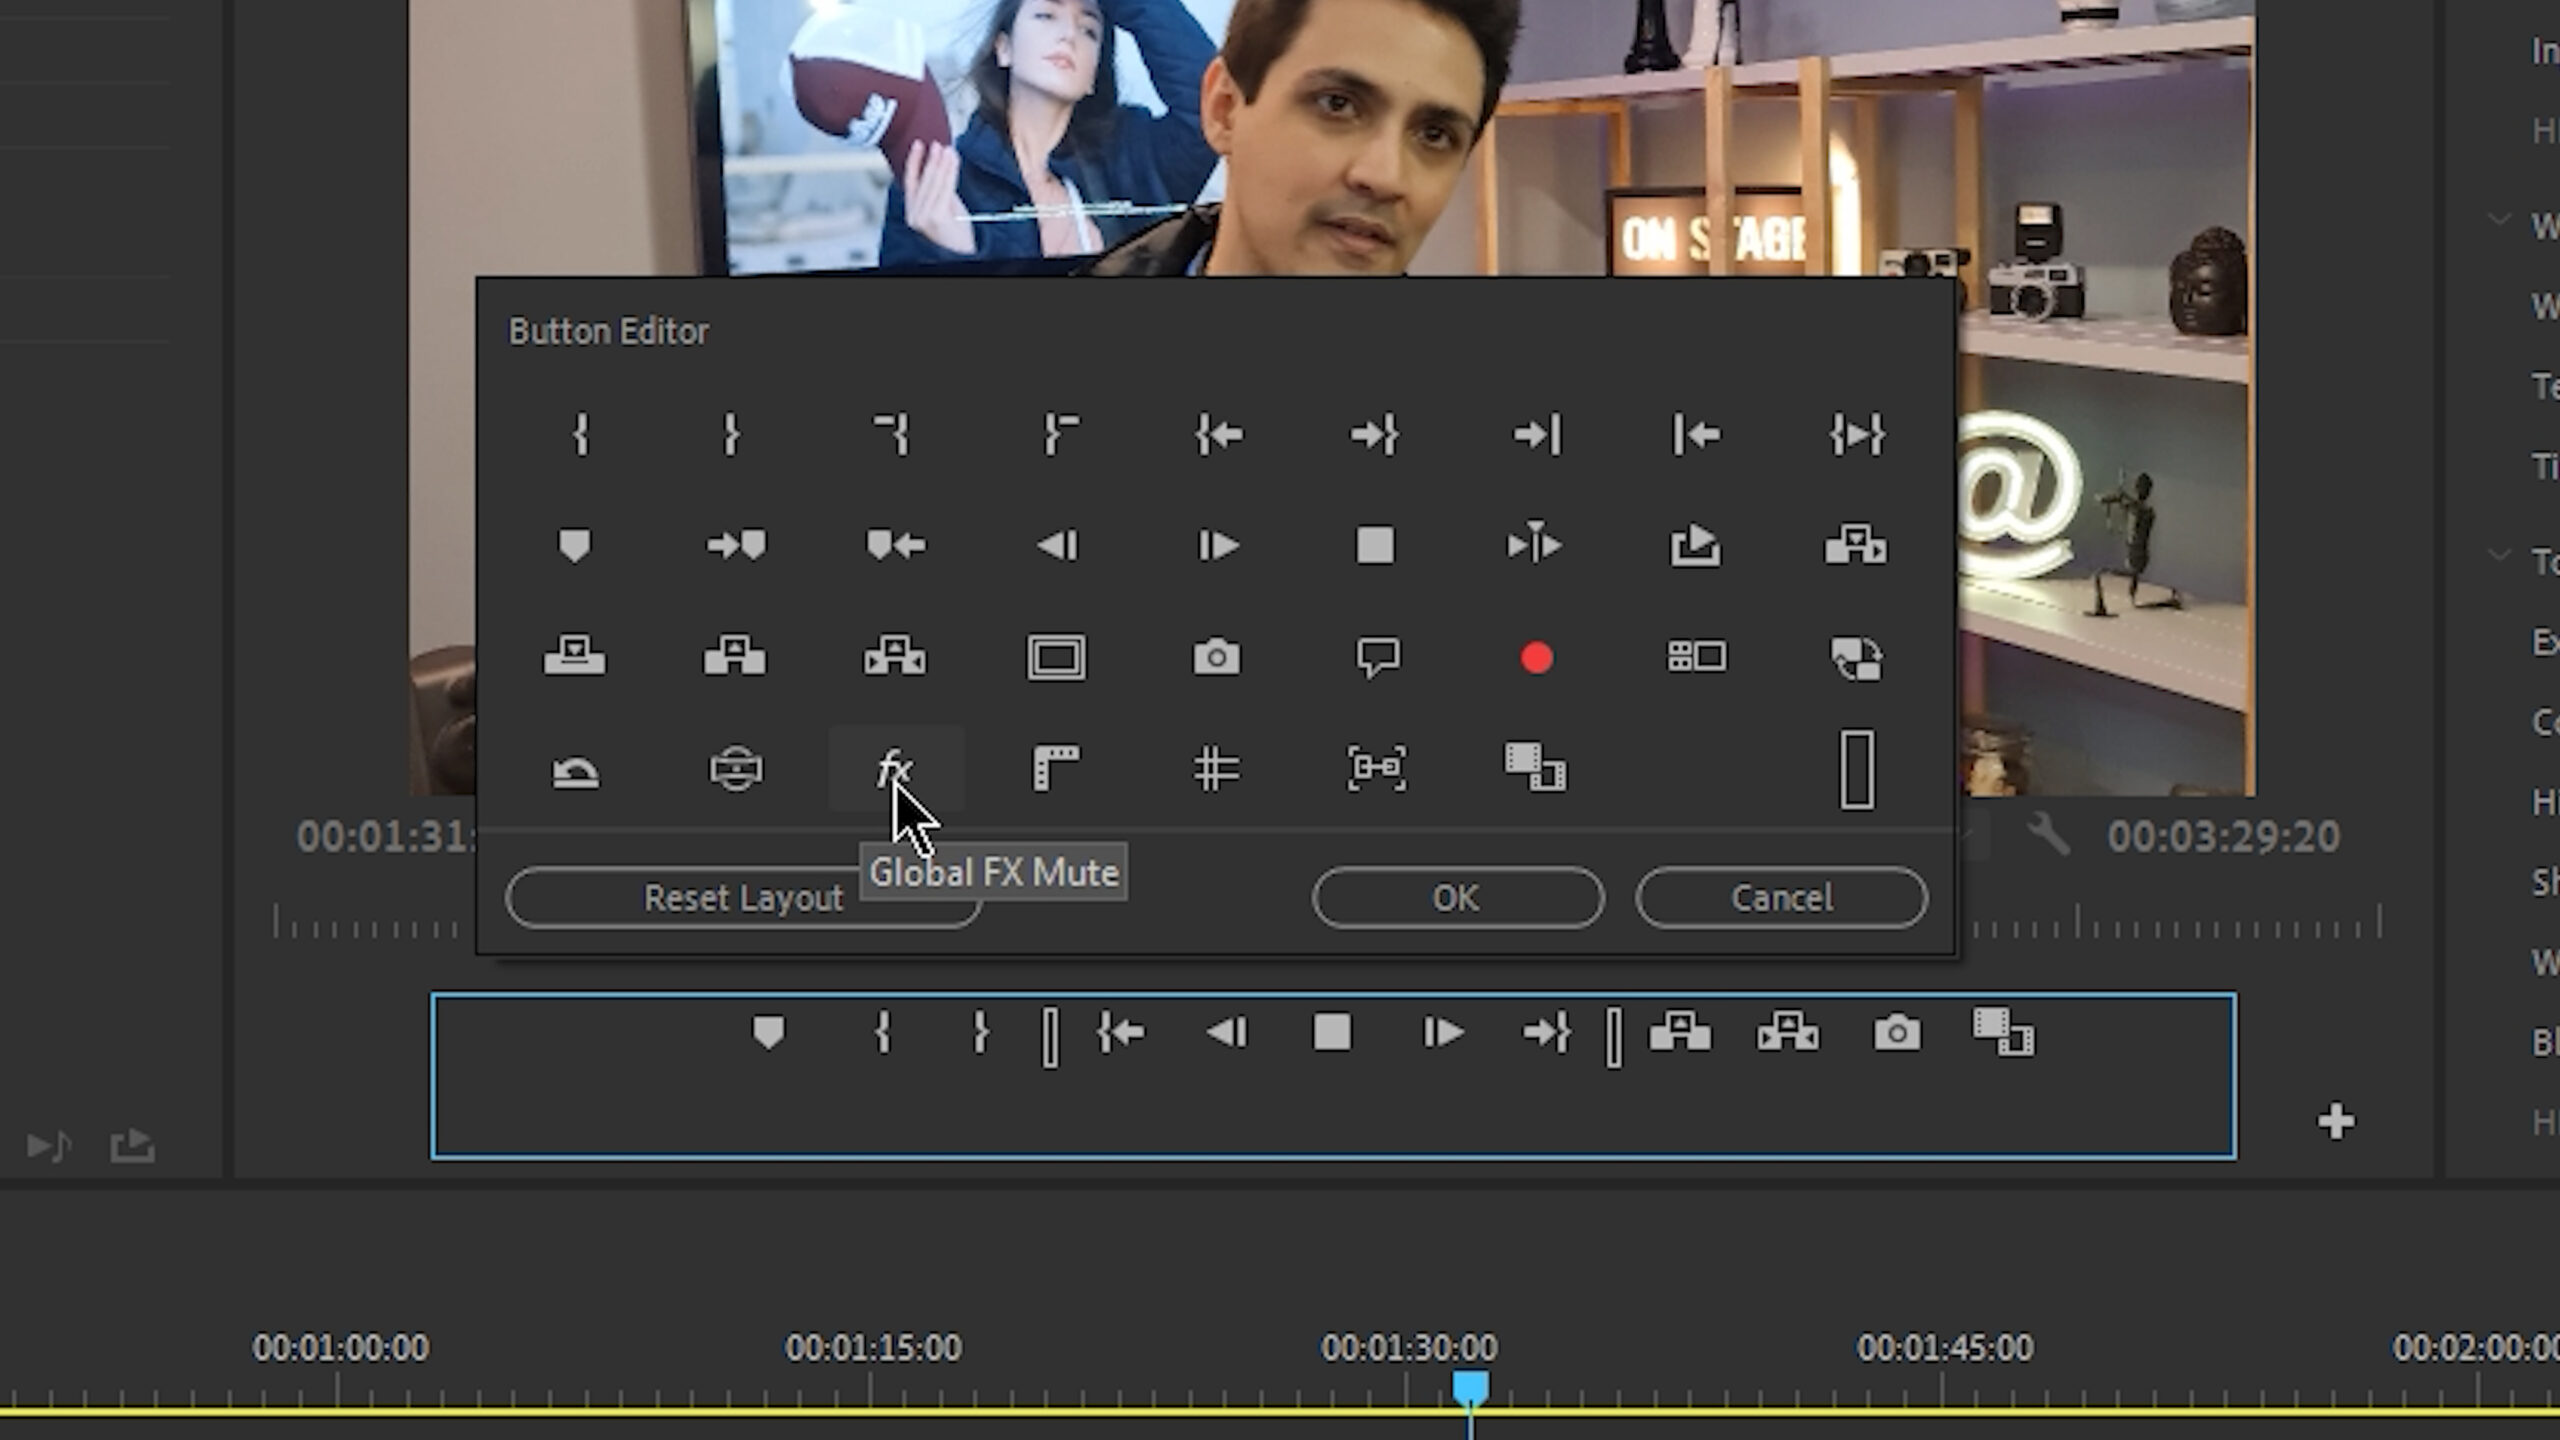
The FX icon is not included in the standard Premiere Workspace. But you can add it to your workspace by dragging it from the plus icon under your playback. Turning FX on and off will let you take control of your effects and activate or deactivate them temporarily. But what is the use for it you may ask. Imagine a scenario where you have finished editing a video and now you are in a locked cut process. After doing some reviews yourself or with your client, you realize that the video needs some changes. You can now either go back and start working on a massive timeline with so many effects, or disable all the effects for the time being in order to lighten up your timeline and virtually go back to the rough cut process!
Proxy Your Footage:
Using the Proxy option can do wonders! The proxy will transcode your footage with a codec like “mp4” or “mov” with any bitrate or color depth and resolution. It doesn’t even matter if it is 4K or 8K. Not even your camera model has any effect here, Arri Alexa, RED, Blackmagic, Sony, Canon, Drone camera, you name it! What happens here is that you have a very light timeline now that has the power to go back to being full form by just the click of a button. Sounds exciting, doesn’t it?
Adobe Media Encoder is by far my go-to software for transcoding and exporting After Effects and Premiere projects. Media Encoder works as a complementary software that will transcode the original footage. To get the best out of these software, make sure that all of them and all of your codecs are up to date at all times.
How to Edit 4k Videos Fast Using Proxies
In the destination tab there exists an amazing feature that will transcode both original and transcoded footage next to each other and then you will have the option to set the destination for your end product. The end result may not be that different but that is beside the point. This footage is for review purposes and in this form, making decisions is much easier.
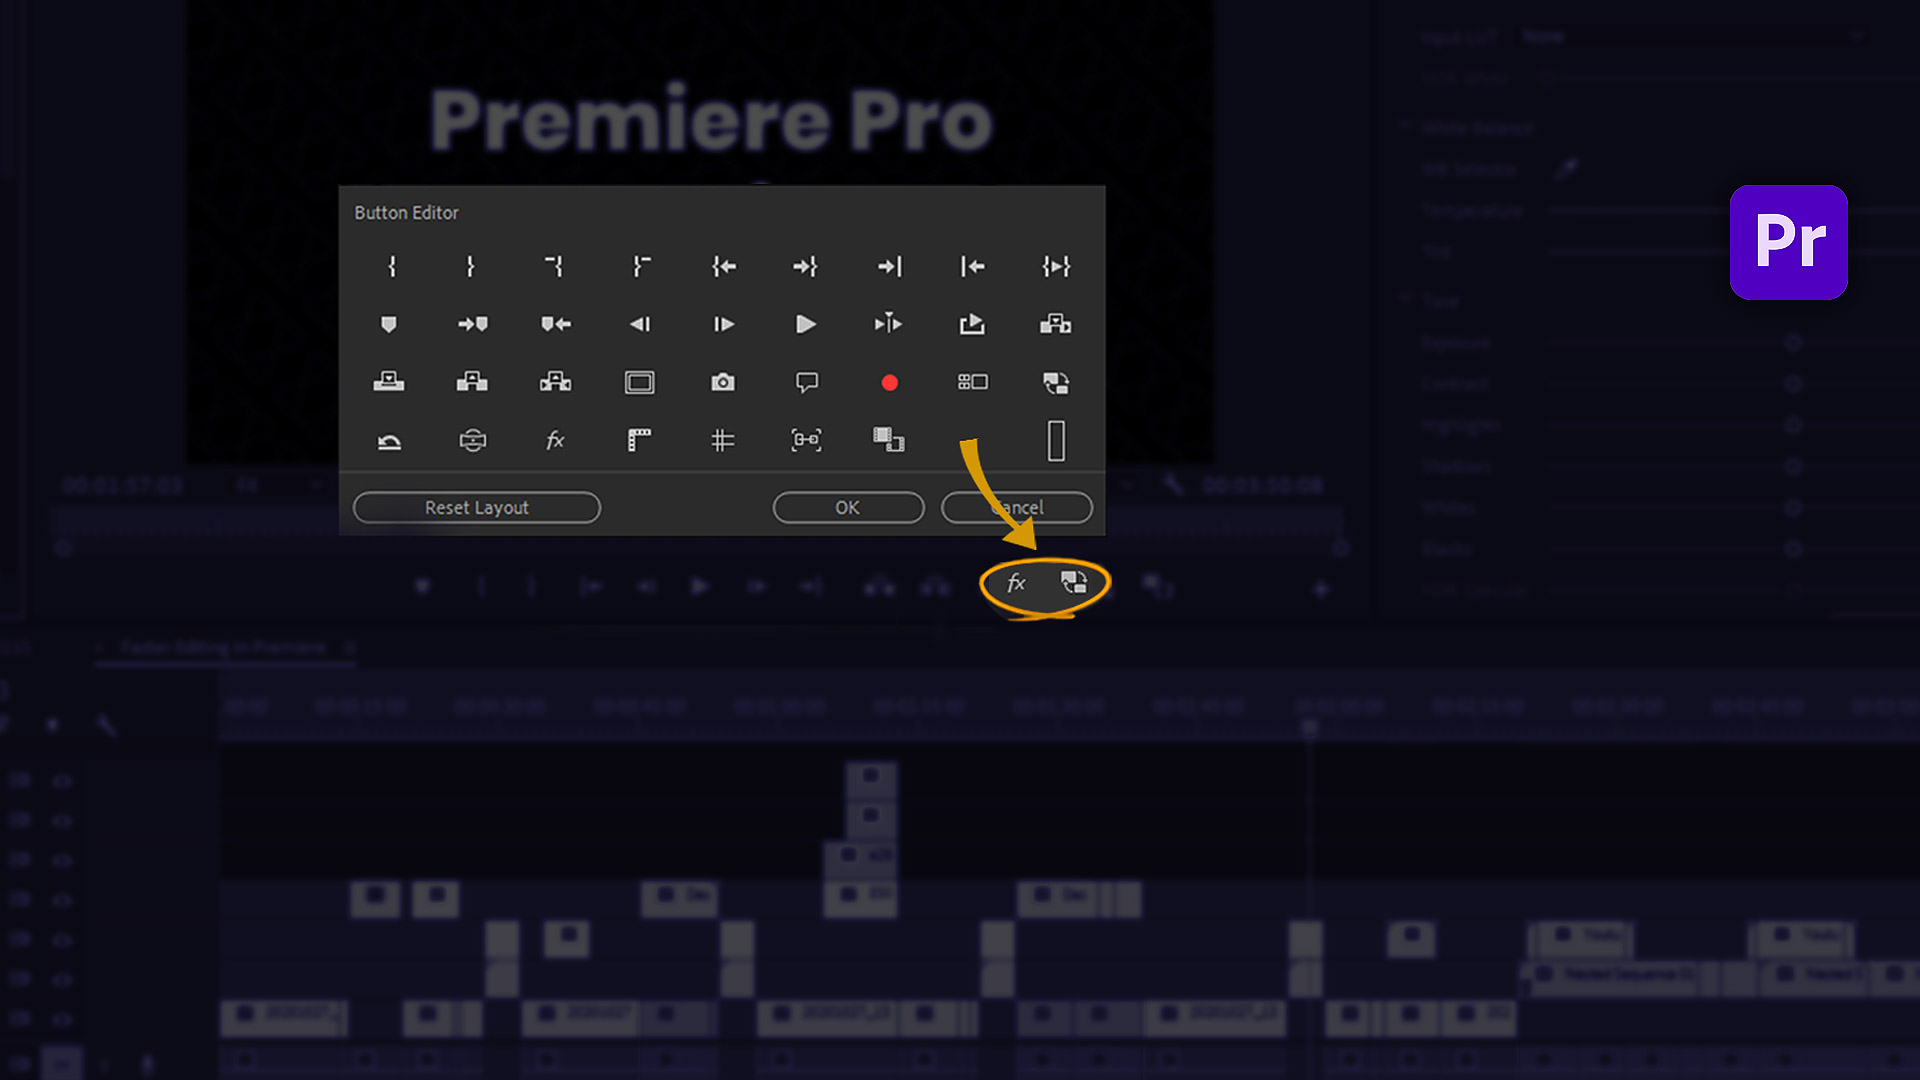
Media Encoder will arrange all of your footage and automatically encode and sync them with premiere. After finishing this stage, you will add toggle proxies to our workspace the same way you added the FX Mute button. Activating this tool will transform our files into transcoded ones and deactivating it will roll them back to their original form.
Conclusion:
I personally am always on the road and as a result, I have to edit on my laptop. Also when I’m on set recording, I need to check different footage side by side. Even when I’m on my PC, checking 4K Arriraw footage can become quite challenging. But with this method, working on footage can be easy and hassle-free even on your laptop.
Just as a final word, always try to keep your system clean. Do regular disk checks and temp cleaning. Keep your general files on other storages and use your work drive as a dedicated drive especially if it is an SSD. SSDs work much faster when they have more free space.
