Shaky video footage is the last thing any video maker wants unless it’s somehow intentional and for artistic and creative purposes. So that’s why they use tools and gears to keep the camera away from any unwanted movement. But sometimes those tools aren’t in hand and the result is shaky. In situations like this, we hear the saying “we’ll stabilize video in post”. So let’s see how you can fix it in post using some tools in Adobe After Effects.
Setting Up Your Footage
Before you can stabilize shaky videos, you’ll want to get your clips into After Effects. Import your shaky video files by going to File > Import or just dragging and dropping into the Project panel.
It’s usually best to work with clips that are free of any effects or modifications when stabilizing. So if you already did any color correction, scaling, etc. make sure to stabilize first on your original raw footage.
For the best stabilization results, your clips should be in a format with tons of detail and minimal compression like ProRes, DNxHR, or CinemaDNG RAW video. Highly compressed footage like h.264 from DSLRs can be more difficult for After Effects to track.
Warp Stabilizer VFX
-
Import your shaky footage inside After Effects and add it to the compositions panel to start working on it.
-
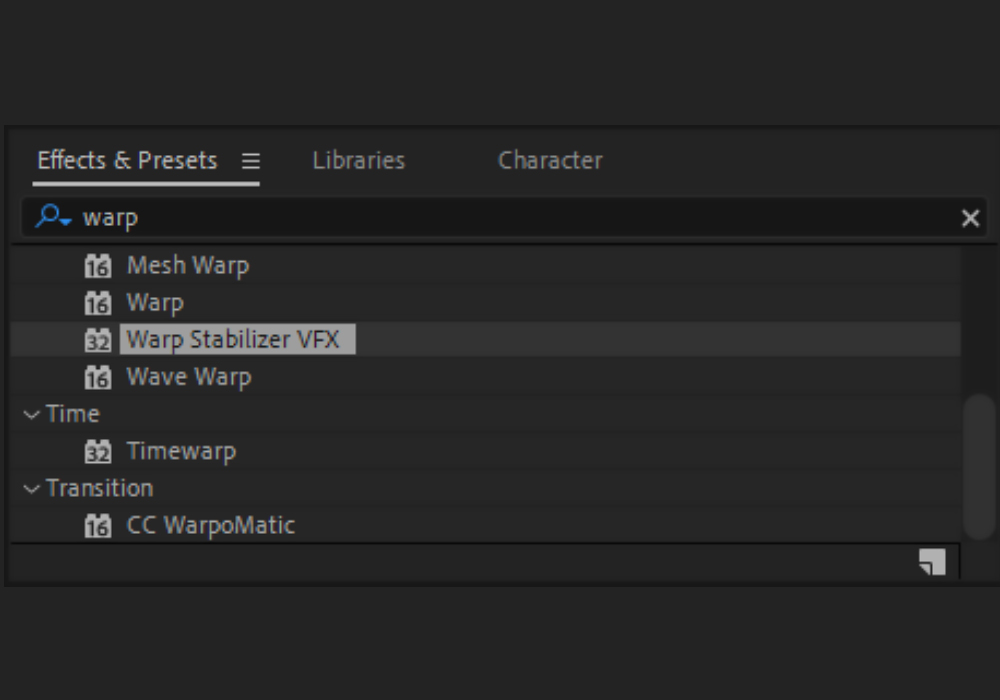
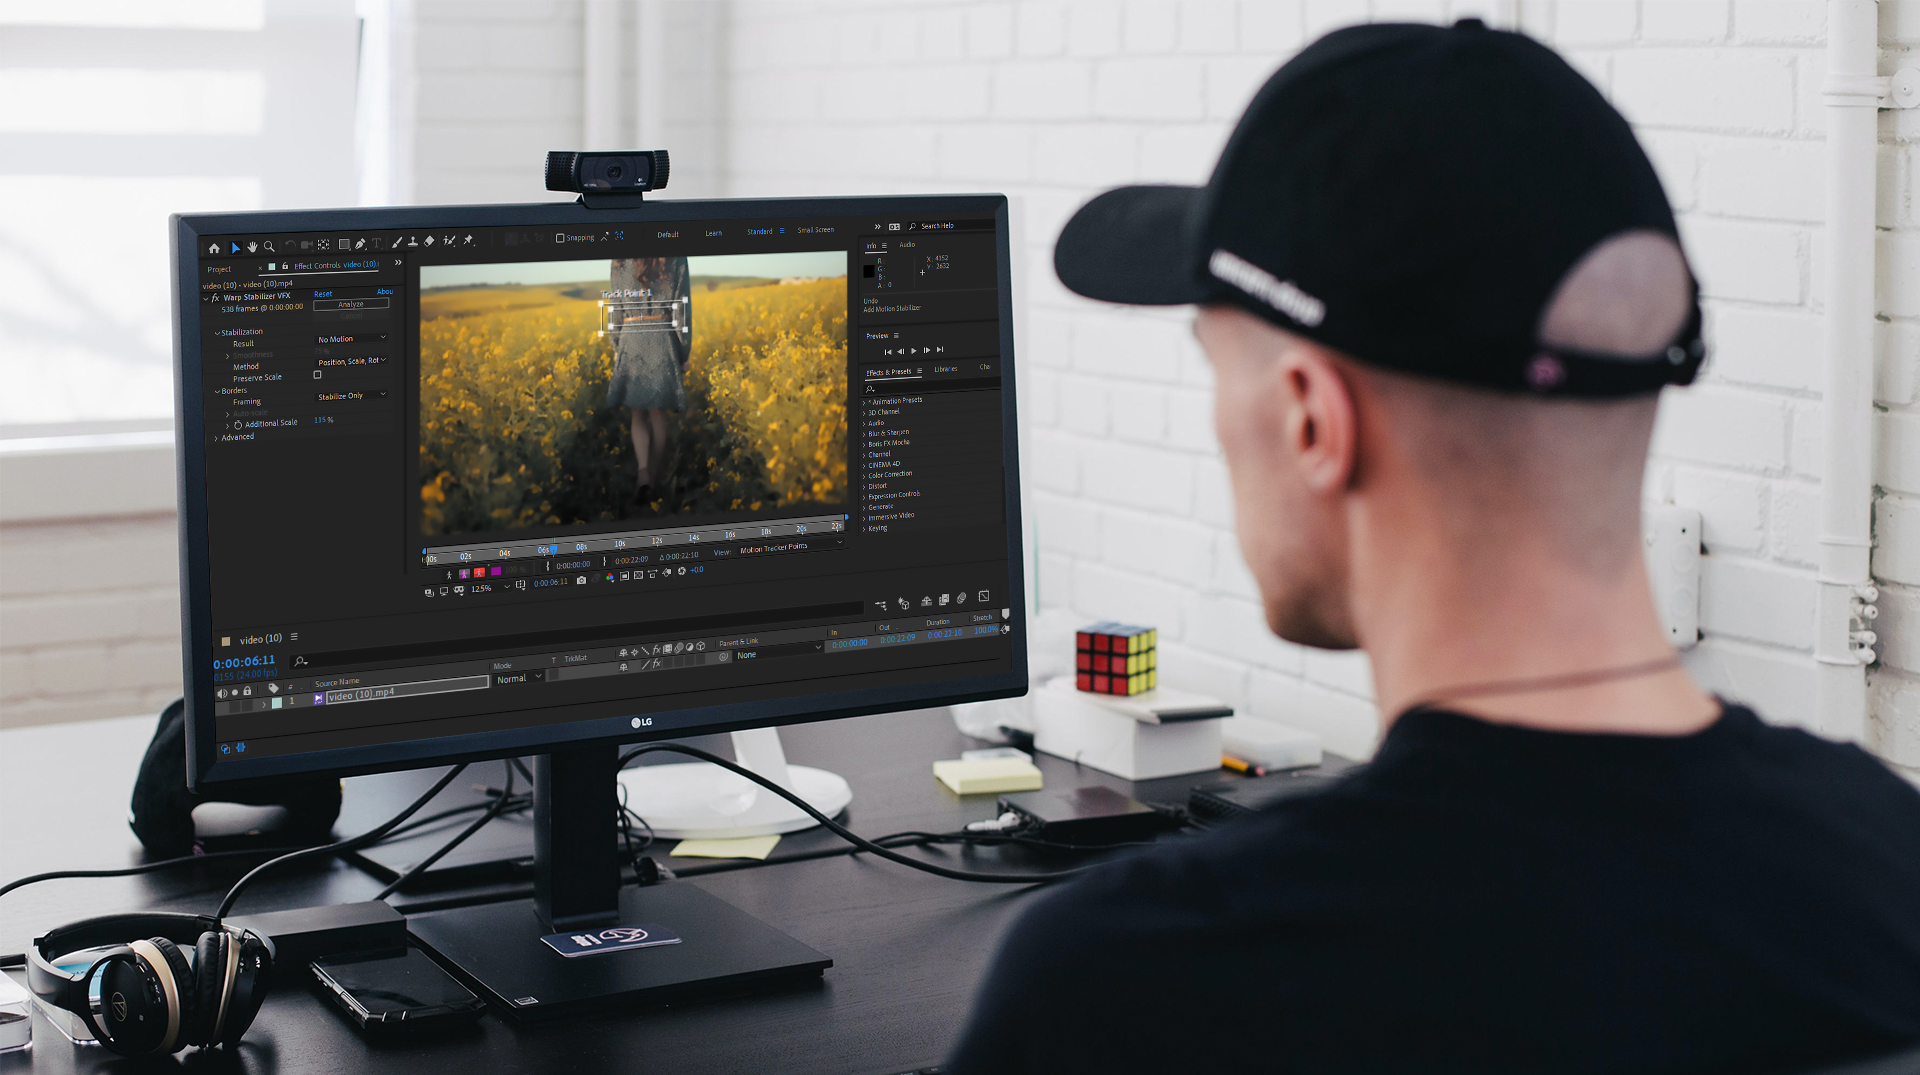
Go to the Effects & Presets panel to find an effect called Warp Stabilizer VFX and add it to your composition. As soon as you add the effect to your footage, After effects will first analyze it in the background which is shown by a blue banner and then stabilize it which is shown by an orange banner.
-
When the stabilizing is done and the orange banner is gone, you can see that your footage looks a bit better than before. The scale of your footage is also increased a bit to hide black gaps that occur when the image is repositioned in the stabilization process.
-
Because it’s not convincing yet, go to the Effects Control panel to adjust some settings of the Warp Stabilizer effect.
-
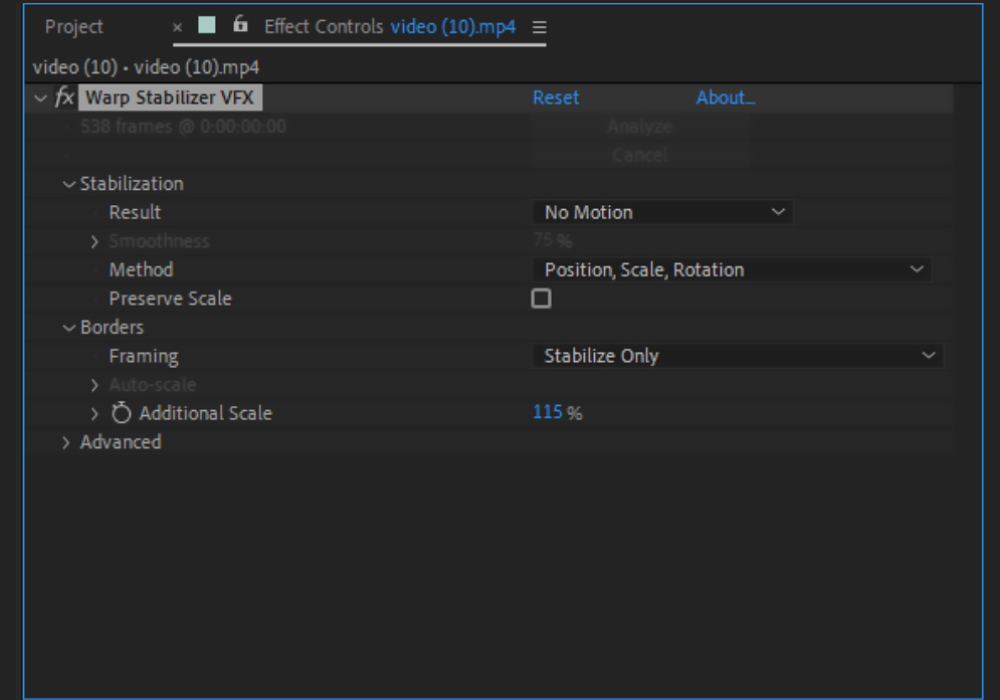
In the Effect Controls panel, increase the Smoothness amount to 75%. You will see that the footage is being stabilized once again.
-
Choose No Motion under the Result menu to enable the program to lock the camera in position. In order to achieve this effect, Warp Stabilizer VFX scales up the clip even more so it’s way better to have a 4k image or higher to keep the quality intact.
-
Choose Position, Scale, Rotation from the Method menu, Stabilize Only from the Framing menu and Increase the Additional Scale to a percentage that covers all the black edges behind the frame.
Now your footage looks way more stable than before.
Stabilize Motion
To stabilize your footage using the Stabilize Motion feature:
-
Bring up the Tracker panel in your workflow by enabling it from the Window menu.
-
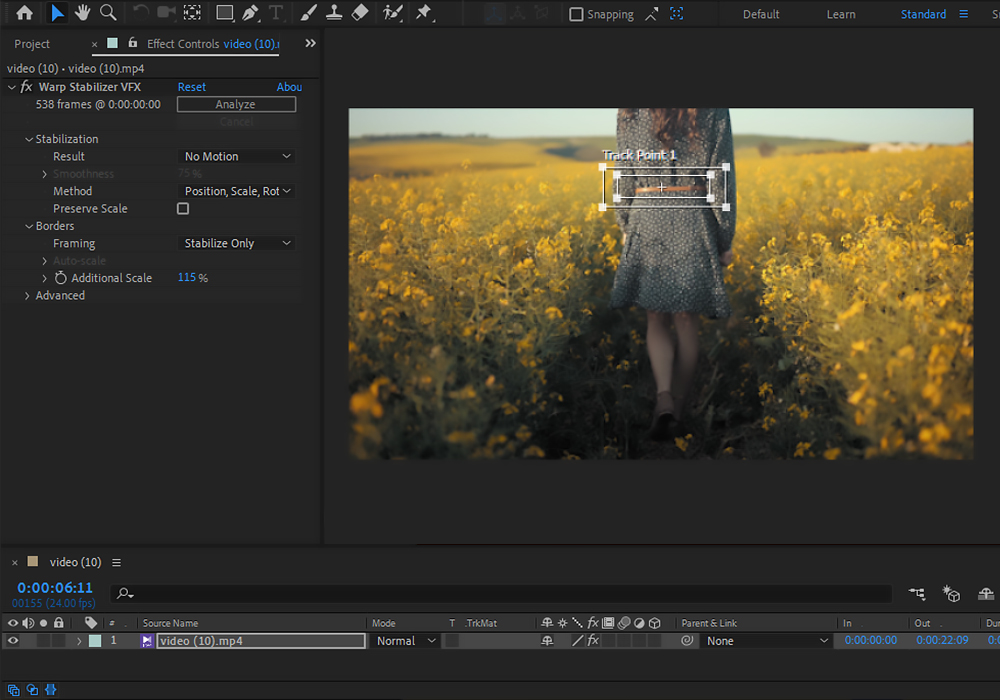
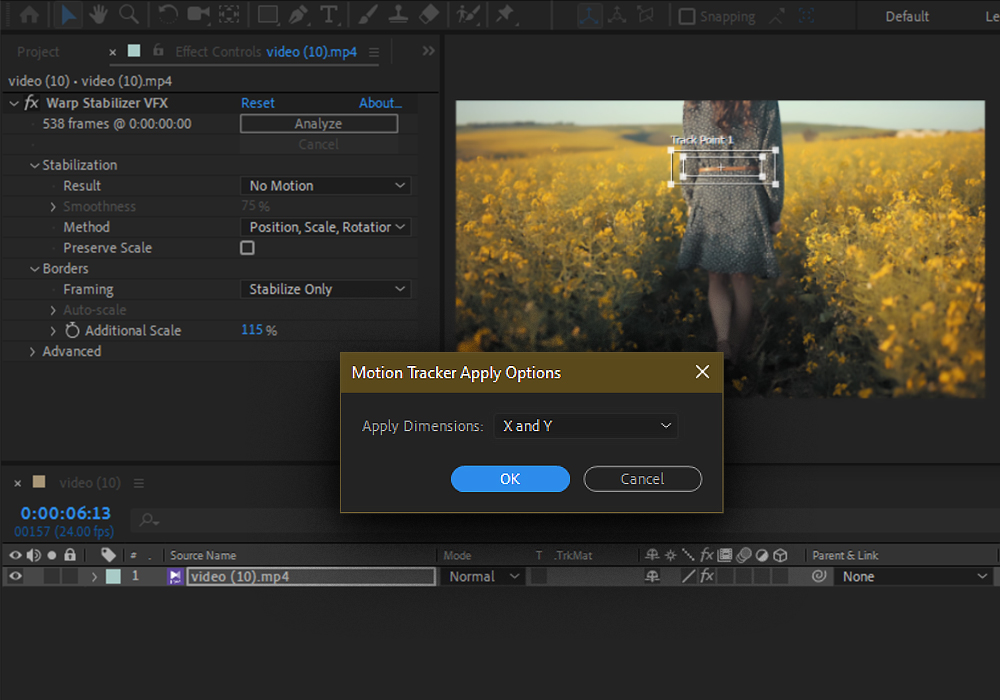
From the Tracker panel, click on the Stabilize Motion so that a tracker box appears within your layer screen.
-
Set the tracker box on a subject that you want to be stable during the video clip. For example, if you’ve got a shot from a walking person, you should set the tracker box on him to tell the program to use him as the anchor to stabilize the footage.
-
Hit the Play button within the tracker panel to make sure the tracker box sticks to your specified spot. If your tracking points going askew, click the stop button, backtrack manually adjust the tracking point, and hit play again to continue tracking.
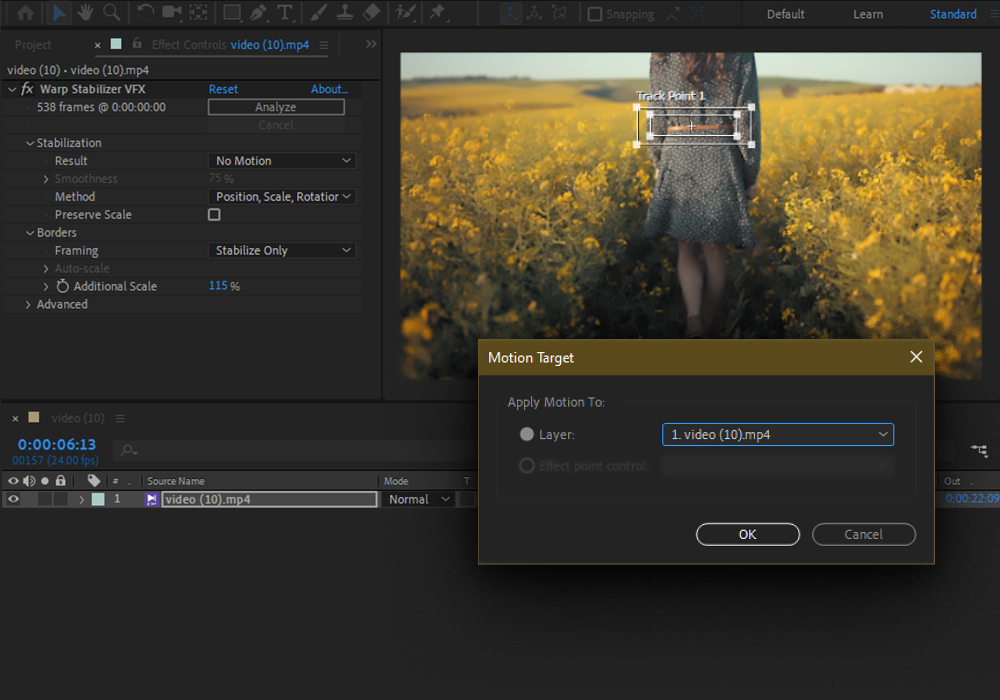
5. Once you set the tracker properly, click on the Edit Target to apply the tracking data to the exact layer that you’re working on.
6. Hit the Apply button and in the opened dialogue box select X and Y.
Now your footage preview should look a lot nicer than the previous version, but keep in mind that this method works better for videos with a specified subject to focus on.
Advanced Camera Tracking and Stabilization
After Effects also includes powerful built-in 3D camera tracking that you can use for super accurate motion stabilization. This involves manually tracking points or objects in your footage which AE then uses to reconstruct the original 3D camera motion and remove any unintended movements.
Tracking and Stabilization Workflow:
-
Make a new composition-sized solid layer
-
Nest your shaky video footage layer inside this solid layer
-
Go to Animation > Track Camera in the solid layer
-
Define areas to track by setting tracker target points
-
Analyze the sequence once for each tracked area
-
Go to the nest’s parent layer and apply: Perspective > Stabilize
-
Tweak the Stabilize settings like camera framing, etc.
This creates a perfectly smooth movement path by removing all small vibrations and camera shake based on the 3D tracking data. The stabilized result is automatically rendered inside your composition viewer.
For finer control, you can also track specific areas on objects or faces and stabilize just those portions of the footage using masks.
Adding Motion Blur to Stabilized Video
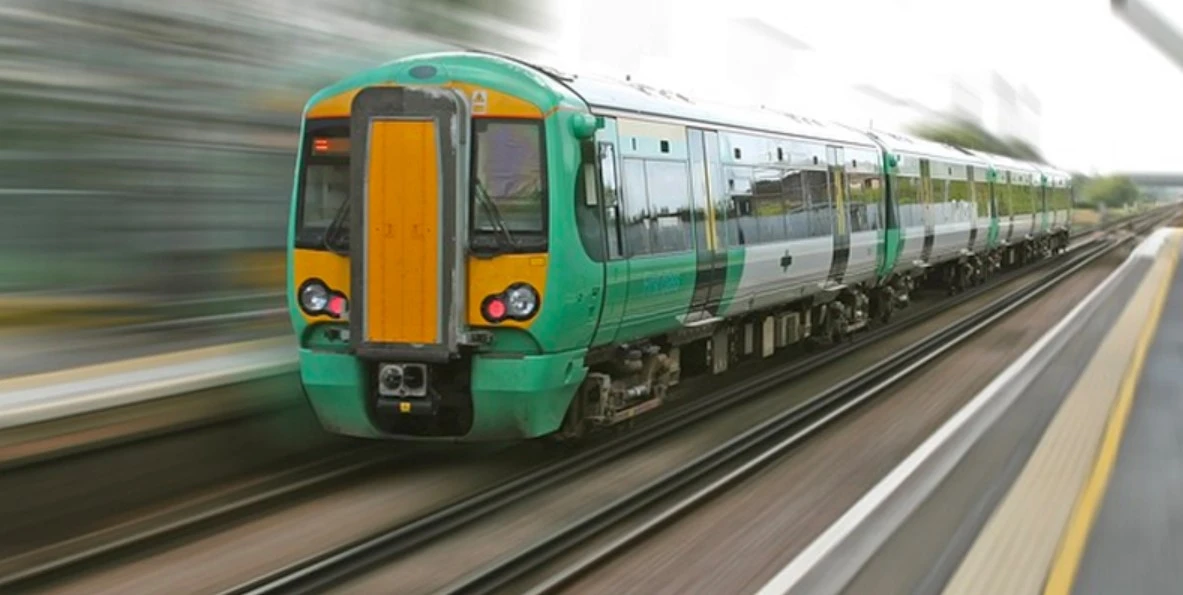
While stabilizing removes unwanted shake, it can sometimes leave your video looking incredibly sterile with a very rigid quality to the camera motion. An easy way to re-introduce a naturalistic blur effect is to apply software-based motion blur:
-
Back in the Timeline, precompose your stabilized footage layer
-
Apply the CC Force Motion Blur effect
-
Increase the Shutter Angle value to add motion blur amount
-
Enable Motion Blur Behavior for even smoother interpolation
The higher the shutter value you set, the more exaggerated the motion blur streaking will become. Just 180°–360° usually looks pretty realistic. This gives stabilized video a much more natural, filmic quality without any of that lingering wobbliness.
Plugins
Another way to fix your shaky footage is to use plugins:
REELSTEADY is one of your options for After Effects. It offers higher-level technical tools to get into the details of your tracking data even more and ensure you of doing the best stabilization possible at $399.
Another handy plugin for stabilization in After Effects is MERCALLI V4 which is more affordable with the price tag of $299. Mercalli is compatible with both After Effects and Premiere Pro so you don’t have to switch between them.
Partial Stabilization/Locking
What if you only need to stabilize portions of your video? Maybe parts of the clip have intentional camera motions or whips that you only want to stabilize or preserve.
You can apply stabilization in After Effects to just a specific time range:
-
Make a freeze frame at the start of the shaky segment
-
Apply Warp Stabilizer to this freeze, let it analyze the future frames
-
Trim the analysis range to only the shaky segment you want stabilized
-
Increase the Output composite preservation to 100%
This isolates the stabilization to just the selected segment. Everything before and after that range will retain its original unstabilized motion.
Alternatively, you can lock specific portions of the footage to prevent them from being adjusted by the video stabilization software:
-
Use masks to define areas you don’t want stabilized
-
In Warp Stabilizer, enable Lockdown under Advanced settings
-
Set the Lockdown value based on how much to preserve
This clever trick tells After Effects to keep certain parts of the video pinned in place while letting the rest of the frame be smoothed out.
Stabilizing Difficult, Extremely Shaky videos
Some video clips are just really difficult to stabilize due to things like:
-
Extreme blur or lack of detail to track
-
Very fast erratic camera movements
-
Obstructed or changing scenes
-
Excessive rolling shutter effects
If the automated stabilizers aren’t cutting it, here are some tips:
-
Manually track more targets to give AE better data
-
Use AE’s Mocha plugin for more robust planar tracking
-
Try upscaling and/or denoising the footage first
-
Precompose layers before applying stabilization
-
Stabilize just short segments instead of the whole clip
-
Do an initial rough stabilization pass, then stabilize again
With some perseverance and creative problem-solving, even the shakiest handheld camera or GoPro footage can be tamed.
Conclusion: Smooth, Professional-Looking Video
By leveraging the stabilization tools in After Effects, you can easily fix shaky, unwatchable video and end up with smooth, natural-looking camera movements. From the simple one-click Warp Stabilizer effect to more advanced 3D tracking features, stabilization is an essential step for serious video work.
So don’t let jittery footage derail your next video project! A little After Effects know-how goes a long way towards pristine, watchable video.

